
 Ethan Cole

To achieve a perfect fit, measure the circumference of your wrist accurately using a soft measuring tape. If you don’t have one handy, a piece of string can work too; just mark the spot where it overlaps and measure that length. This ensures your accessory sits comfortably without being too tight or loose.
When adjusting the band, locate the adjustment holes on the strap. Most premium bands include multiple holes to accommodate varying wrist sizes. If needed, use a watchband tool to create an additional hole in the leather. Carefully position the strap and mark where the new hole should be punched, ensuring it aligns perfectly with the clasp for a secure closure.
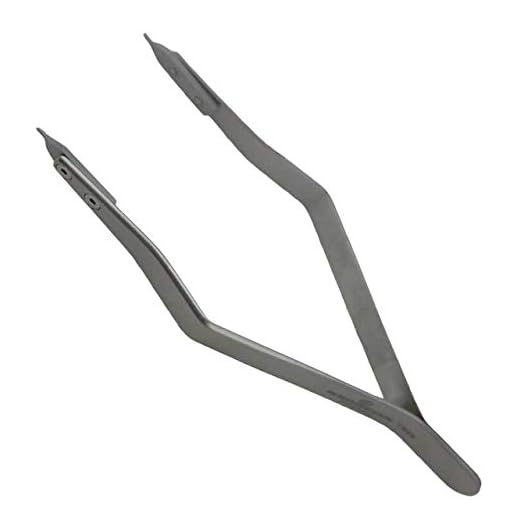
If you’ve opted for a new band, ensure it is compatible with the case of your timepiece. Use the right tools to detach the old band–typically, a spring bar tool will suffice. By pushing in the spring bar, you free the strap, allowing for a seamless transition to your new selection.

Lastly, regularly condition the leather to maintain its suppleness and prevent cracking. A quality leather conditioner can extend the lifespan of your strap, keeping it looking pristine and enhancing comfort as it molds to your wrist over time.
Adjusting the Strap of a Timepiece
To achieve a comfortable fit, consider using a leather conditioner. This can soften the material, making it more pliable and easier to mold to your wrist shape.
For minor length modifications, simply remove links from a metal clasp or adjust the pin on a buckle style. Be cautious not to damage the leather with excessive force.
Using a needle and thread, you can also create additional holes in the strap for a more precise fit. Ensure the spacing aligns with existing holes to maintain aesthetics.
For a tighter embrace, fold excess material under and secure it using a discreet leather adhesive. This method also prevents wear and tear on the exterior.
Regular cleaning with a damp cloth will prevent accumulation of dirt and oils, ensuring that the strap remains elegant and functions optimally.
Identifying the Right Size for Your Wrist
Measure your wrist with a soft measuring tape. Wrap it snugly around the wrist bone to get an accurate circumference. For a precise fit, note the measurement in centimeters or inches.
Wing It with a String
If a measuring tape isn’t available, use a piece of string. Wrap it around your wrist and mark where it overlaps. Then, measure the string against a ruler for your size.
Consider the Fit
A proper fit should allow for slight movement without pinching. Leave enough space for comfortable wear throughout the day. Aim for a gap of about two fingers between your skin and the strap.
Tools Needed for Strap Modification
Utilize a spring bar tool for removing and adjusting the pins that hold the strap to the case. This tool typically features a pointed end for precision work and a forked end for pushing the bar back into place.
A pair of scissors or a cutting tool is essential if trimming the strap is required. Ensure the blades are sharp for a clean cut, preventing fraying.
Punching Tools
For creating additional holes, a leather hole punch will facilitate accurate placements. This instrument comes in various sizes, allowing for customized fit adjustments.
Finishing Supplies
Edge finishing tools, such as an edge beveler or burnisher, help provide a polished look after any modifications. Leather conditioner is also recommended to maintain suppleness after alterations.
Step-by-Step Guide to Shortening the Strap
Begin by determining the number of links or holes needed to remove for a proper fit. Place the band around your wrist for a preliminary assessment. Mark the desired length using a pencil or a fine-tipped marker.
Removing Links
If your accessory features removable links, utilize a pin pusher tool. Position the band with the link facing upwards. Locate the pin connecting the links and carefully push it out using the tool, ensuring to apply steady pressure without damaging the band. Repeat this for each link you wish to eliminate. Reassemble the links after adjustment by sliding the pin back into place.
Fixing Holes for Punch Strap
For bands made of strap material, identify the correct hole. If none fit perfectly, create a new hole using a leather punch. Align the punch vertically over the marked spot, ensuring it’s centered. Apply firm pressure on the punch to pierce through the material. Test the fit again, and make adjustments as necessary to achieve optimal comfort.
Techniques for Extending the Leather Strap
To lengthen the strap effectively, there are several established methods that can be employed. The optimal technique is to replace the buckle with an extended one or add additional holes to make it more versatile.
Using an Extension Piece
An extension piece, crafted from compatible material, can be added to create extra length. This option maintains the overall aesthetic while providing additional room. Ensure that the extension matches the existing strap in color and texture for a seamless look.
Adding Holes for Adjustment
Creating new holes is a straightforward method. Utilize a leather punch tool to make new holes about 1/4 inch apart. Ensure that the added holes are evenly spaced and aligned with the existing ones to maintain uniformity. It’s advisable to reinforce the area around the new holes with hole reinforcements to prevent tearing.
| Method | Description | Tools Required |
|---|---|---|
| Extension Piece | Add a compatible piece to increase length. | Extension, adhesive (optional) |
| New Holes Addition | Create additional holes for more fit options. | Leather punch, ruler, reinforcement |
Maintaining the Leather After Adjustment
After resizing, ensure longevity by regularly conditioning the band. Opt for specialized leather conditioners to keep the material supple and prevent cracking.
Follow these steps for proper upkeep:
- Wipe the surface with a soft, dry cloth to remove dirt and moisture.
- Apply a small amount of conditioner using a soft cloth, rubbing it in gently to cover the entire surface.
- Let it sit for a few minutes, then buff with a clean cloth to restore shine.
Avoid exposing the strap to excessive humidity and direct sunlight, as these can cause deterioration. Store it in a cool, dry place when not in use.
Be cautious with water; moisture can stain or warp the surface. If it gets wet, dry it slowly at room temperature, away from heat sources.
Every few months, inspect for signs of wear, such as fraying edges or discoloration, and address any issues promptly to maintain its appearance and functionality.


