
 Ethan Cole
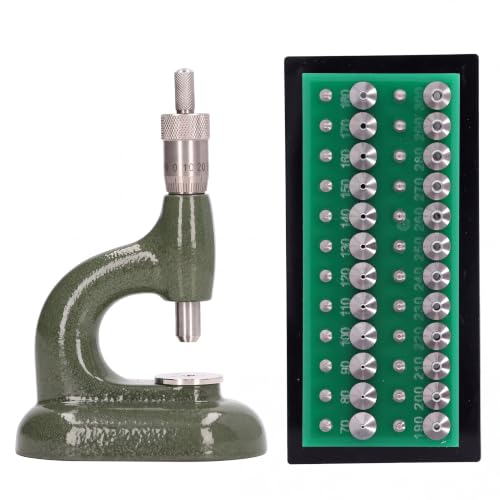
Begin with selecting a standard analog or digital timepiece that suits your preferences. Ensure the device has a removable band and accessible inner components to facilitate adjustments. This selection process is crucial for seamless conversion.
Next, disassemble the chosen device carefully. Use precision tools to detach the back cover, revealing the internal mechanism. Document the arrangement of components, as this will guide you in repositioning them into a more compact format. Keep track of screws and small parts to prevent loss.
Consider incorporating a microcontroller as the brain of the creation. This can enhance functionality by enabling features such as Bluetooth connectivity or sensor integration. Integrate the microcontroller with the original display to maintain the aesthetic while enhancing performance.
When reassembling, focus on compacting as much as possible. Utilize 3D printed casings or modular attachments that allow for easy handling of additional electronics. Ensure the final prototype is functional while retaining the original design elements that appealed to you in the first place.
Test the newly assembled unit meticulously to confirm operational integrity. Check for stability in connections and reliability of features. This step is vital in assessing the success of your transformation.


Transforming a Timepiece for Innovative Applications
Begin with selecting a suitable timepiece, preferably one with a modular design. Look for models that allow easy access to their internal mechanics, such as quartz movements.
Carefully open the casing using a watch case opener. Ensure that all delicate components are handled with caution to avoid damage. Once inside, remove the original movement to free up space for new elements.
Consider integrating a small microcontroller or development board (like Arduino or Raspberry Pi). This will enable programming for various features like notifications, environmental sensing, or connectivity options.
Utilize a narrow OLED display to provide information visually. Ensure it fits within the existing frame. Connect it to your microcontroller, following the datasheet instructions for proper wiring.
For additional functionality, incorporate sensors such as temperature, humidity, or accelerometers. Confirm their compatibility with your microcontroller. Position them securely inside the case, ensuring minimal movement.
A small, rechargeable battery is advised for power. Ensure appropriate voltage and size to fit within the casing without disrupting the aesthetic.
Utilize software tools to program desired functionalities. Libraries specific to your microcontroller will simplify code writing. Implement user-friendly interfaces for seamless interaction.
Evaluate the waterproofing and durability of the modified piece. Use silicone sealants in appropriate areas to maintain integrity against moisture.
After completing installations, carefully reassemble the casing. Test all functionalities to verify operation. Make adjustments as needed.
Consider the following table for additional elements and suggested sources:
| Component | Purpose | Recommended Source |
|---|---|---|
| Microcontroller | Processing | Arduino, Raspberry Pi |
| OLED Display | Visual output | Adafruit, SparkFun |
| Sensors | Environmental data | Amazon, Digi-Key |
| Rechargeable Battery | Power supply | Batteryspace, SparkFun |
| Silicone Sealant | Waterproofing | Home Depot, Amazon |
Selecting the Right Timepiece for Alteration
Choose a model with a mechanical movement for better customization options. These types often allow easier access to the inner components compared to quartz versions.
Consider the size and shape of the case. A larger case provides more space for additional features or modifications, while a unique shape can enhance the final aesthetic.
Focus on the brand reputation; models from established manufacturers often have more parts available. Popular brands also have extensive online communities, which can offer resources and guidance.
Evaluate the materials used. Stainless steel and titanium offer durability, while acrylic crystals can be easier to replace or modify than sapphire.
- Mechanical watches
- Available spare parts
- Case size and geometry
- Material durability
Assess the type of complications. Options with more features can provide diverse avenues for innovation. Simple designs may allow for focused enhancements or a clean aesthetic overhaul.
Examine the existing design elements. A timepiece with a modular system or easily removable components can simplify alterations and repairs.
Testing the watch’s mechanical integrity before starting modifications ensures you have a solid foundation for your project. This step helps avoid complications later on.
Gathering Necessary Tools and Materials
Acquire a fine-tipped screwdriver set suitable for opening the case back of your timepiece. Ensure the sizes cover the common screws used in various designs.
Include a pair of tweezers; precision ones will help with handling small components. Select a flat, non-marring case opener to prevent scratches on the surface.
Obtain a soft microfiber cloth to keep the components clean during the process. Dust and debris can impede the fine workings.
Secure a small container or magnetic tray for organizing parts and screws. This will prevent loss during the procedure.
Consider specialized adhesive if you plan to attach new features or enhancements. Research options that cure rapidly yet provide strong bonds.
If modifying functionalities, gather wires and soldering tools. Ensure you have a reliable soldering iron for electronic adjustments.
Lastly, wear safety goggles to protect your eyes, especially when working with tools that can cause small debris to fly.
Disassembling the Timepiece: Step-by-Step Guide
Carefully remove the case back using a case knife or a small flathead screwdriver. Gently pry around the edges to loosen it, ensuring not to scratch the surface of the casing.
Removing the Components
Once the rear cover is off, locate the movement. Detach any screws holding it in place. Often, there will be a set of clips or retaining screws securing the mechanism within the case. Unscrew or unclip these components with precision to avoid damaging delicate parts.
The next step involves taking out the battery. If it’s a quartz type, gently lift it from its compartment. For automatic or mechanical models, unscrew the rotor if applicable.
Take out the hands using a hand remover tool to prevent bending or breaking. Lift each hand from the movement one by one, starting from the second hand, followed by the minute and hour hands.
Extracting the Dial
Once the hands are removed, carefully lift the dial from the movement. Look for any securing screws or pegs that may be holding it in place. If necessary, use a pair of tweezers for better grip.
Keep all parts organized. A small container can help to store screws, hands, and components for easier reassembly or modification later.
Take care when handling all elements, as they are often fragile. A clean workspace can minimize risks of losing small pieces or causing scratches.
Upon disassembling the device, you’re now equipped to introduce new features or customize the functionality according to your vision. Proceed methodically to ensure a seamless transformation.
Integrating Electronics for PoC Features
Begin by selecting a compact microcontroller, such as the Arduino Nano or ESP32, as they offer sufficient processing power and connectivity options. Ensure your chosen board has GPIO pins available for interfacing with additional components.
Incorporate a small OLED display for visual feedback. Opt for a 0.96-inch I2C OLED, as it consumes minimal space and power while providing clear readouts. Connect it to the microcontroller using the I2C protocol for easy communication.
Adding Sensors
Consider implementing sensors like a heart rate monitor or an accelerometer to enhance functionality. Choose the MAX30100 for heart rate monitoring, as it integrates well with microcontrollers through I2C. For motion detection, the MPU6050 accelerometer can be linked similarly, enabling features like activity tracking.
Power Management
Battery selection is crucial; utilize a lithium polymer (LiPo) battery for a balance of capacity and size. Integrate a power management circuit, such as the TP4056, for safe charging and battery protection. Keep the circuit compact to fit within your device without adding significant bulk.
Finally, build a custom PCB to connect all components neatly, reducing wiring clutter, and improving durability. Use appropriate connectors to maintain modularity, enabling easier upgrades or repairs in the future.
Testing Functionality After Modification
Conduct a series of tests to ensure all integrated functions operate seamlessly. Follow these key steps:
- Power Check: Verify the power source is functioning. Use a multimeter to measure voltage levels from the battery.
- Feature Functionality: Test each new feature individually. For example, if a fitness tracker has been added, check step counting and heart rate monitoring.
- Signal Transmission: If Bluetooth capabilities are included, ensure the device pairs correctly with smartphones or computers. Test the range and stability of the connection.
- Sensor Accuracy: Evaluate the accuracy of any sensors integrated, such as temperature or humidity. Compare readings with a calibrated device.
- Software Performance: Review any user interface modifications. Ensure that touch sensitivity and response times are satisfactory, particularly for touchscreen functions.
- Durability Testing: Conduct stress tests. Evaluate how the device performs under varying environmental conditions, such as exposure to moisture or impact simulations.
- Battery Life: Monitor the battery’s performance under typical use conditions. Calculate the duration before recharging is necessary.
- Unit Cohesion: Inspect the physical integrity of the device after modifications. Ensure no components have become loose or misaligned.
Document the results of each test. If issues arise, further adjustments may be necessary to improve overall performance. Keep an eye on user feedback for additional enhancements.
Styling and Finishing Touches for Your PoC Timepiece
Choose a color scheme that complements the original aesthetic. Consider matte finishes for a subtle appearance or glossy coatings for a striking look. Use spray paint or specialized coatings for durable surfaces.
Reposition or replace the hands for better visibility. Opt for bold, contrasting colors or unique shapes to enhance readability and style. Ensure they are aligned correctly before final assembly.
Personalize the strap or band. Leather, fabric, or metal bands can alter the entire feel. Choose materials that match the intended use and comfort requirements while enhancing the overall design.
Add unique features like custom engravings or stickers. Personalized messages or designs can reflect personality and make the piece distinct.
Consider an adequate sealing method to protect electronics and components from moisture and dust. Silicone sealants or gaskets are effective for maintaining functionality and longevity.
Incorporate decorative elements such as gemstones or custom faceplates. These accents can enhance visual appeal without compromising the integrity of the internal mechanics.
Ensure all modifications are secure and stable. Perform a final inspection to verify that every element is firmly attached and functions correctly before use.
Experiment with lighting effects if possible. Incorporating LED lights can not only enhance visibility but also add a modern flair to your creation.
FAQ:
What materials do I need to modify a wrist watch into a piece of art?
To transform a wristwatch into a unique piece of art, you will need basic tools such as a small screwdriver set to take apart the watch, pliers, and tweezers. Additionally, you might consider materials like paint, resin, or beads to add color and texture. Old watch parts can also be used creatively, so having a selection of gears, springs, and dials can enhance the aesthetic of your project.
Can I use digital watches for this modification, or is it meant only for analog watches?
While most modifications are typically associated with analog watches due to their mechanical components, digital watches can also be modified creatively. The process might differ; instead of disassembling gears, you could integrate LEDs or small screens into your design. The key is to focus on how to repurpose the existing elements rather than limiting yourself to one type of watch. Each type can offer unique opportunities for creativity.
Are there any safety precautions I should consider while modifying a watch?
Yes, there are several safety precautions to keep in mind when modifying a watch. First, ensure that you are working in a well-lit area to avoid accidents. Use tools carefully to prevent injuries, particularly sharp items like blades or tweezers. If you are using chemicals for paint or glue, make sure to do so in a ventilated space and consider wearing gloves to protect your skin. Lastly, if you are working with electrical components, always disconnect the power source to prevent shocks. Taking these precautions will help ensure a safe and enjoyable crafting experience.



