Ethan Cole
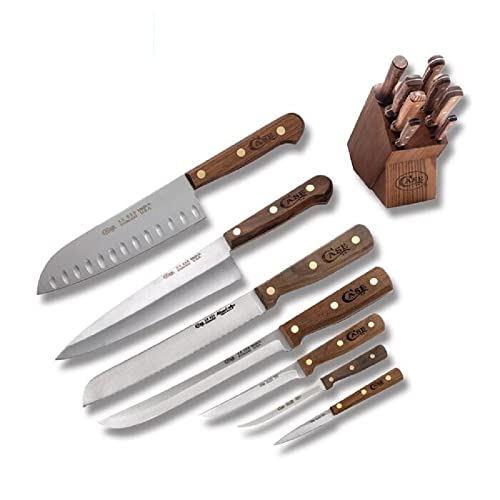
To safely separate the case back of your timepiece, begin by gathering the necessary tools: a case knife or a small flathead screwdriver. Ensure the surface you’re working on is clean and well-lit to avoid losing any small components.
Identify the opening notches on the back of the casing. These are typically found around the perimeter. Insert your tool gently into one of the notches, applying a light prying motion. Avoid excessive force to prevent damaging the casing or the mechanism inside.
Once you have made a small gap, continue around the case back, carefully clicking open each section until the entire lid is released. Be mindful of any small screws or clips that may require removal before proceeding. Proper handling is key to preserving the delicate components within.
Guide to Accessing Your Timepiece
Begin with a soft cloth to prevent scratches. Place the item face down on a stable, cushioned surface. Look for notches or grooves around the case back, which are indicators for easy removal. If available, use a case opener tool or a flat-blade screwdriver, applying gentle pressure.
Removing the Case Back
Locate the appropriate tool suited for your specific model. For snap-on backs, gently pry at the notch with minimal force to avoid damage. For screw-type backs, turn counterclockwise until loosened. Always remember to keep track of small components like the gasket or screws, as losing them can affect functionality.


Internal Inspection
Once access is granted, handle internal parts with care. Avoid touching any delicate mechanisms without gloves, as oils from your skin can cause degradation. Utilize a magnifying glass to examine components clearly and ensure everything is in working order before reassembling.
Choosing the Right Tools for Opening a Timepiece
Using the right instruments is critical for successfully accessing the inner workings of your timepiece. Essential tools include a case opener, which is designed specifically to handle the delicate nature of timepieces without causing damage.
Recommended Tools
A sturdy case knife or a case back remover is vital. The former helps to pry open the back gently, while the latter often comes with multiple attachments for various case types. Ensure that your tools are made of durable materials to withstand repeated use.
Additional Equipment
Consider using a magnifying glass or loupe for enhanced visibility when working. A clean, soft cloth will assist in preventing scratches on the watch surface. Additionally, using a soft mallet can help in cases where the back is stubborn and requires gentle persuasion.
Lastly, organizing your workspace and keeping tools handy ensures a smoother process. Proper lighting and a quiet environment will enhance your ability to focus on the task without distractions.
Identifying Different Types of Watch Casings
Begin with examining the casing material. Common types include stainless steel, gold, titanium, and plastic. Stainless steel is durable and resistant to corrosion. Gold offers a classic aesthetic but may require more maintenance. Titanium is lightweight and hypoallergenic, while plastic is often used in sports models for its shock resistance.
Case Back Styles
The case back can be threaded, snap, or screw-down. A threaded back usually requires a special tool to remove, while snap-on backs can be pried off carefully with a case knife. Screw-down backs are secured tightly and often found on water-resistant models, necessitating a tool for loosening the screws.
Case Shapes
Identify the shape: round, square, rectangular, or tonneau. Each shape influences how the casing interacts with the strap and the user’s wrist. Pay attention to the shape when selecting a proper opener, as different shapes may require specific techniques for access.
Step-by-Step Guide to Opening a Screw-Back Timepiece
Proceed with careful preparation by selecting a clean, flat surface to work on. Place a soft cloth underneath to prevent scratches.
Begin by choosing the correct tool; a case wrench or a set of caseback tools specifically designed for screw-back designs is essential. Verify the tool fits the notches in the casing securely.
Position the timepiece face down. Align the designated tool with the notches on the back casing. Apply gentle yet firm pressure, rotating counterclockwise to release the threads.
If the caseback is particularly tight, apply heat by using a hairdryer on a low setting briefly to expand the metal slightly. This might ease the removal process.
Continue rotating until the casing pops free. Once the back is loosened, carefully lift it off, ensuring not to damage any internal components.
Handle the interior parts with care–an anti-static wrist strap may be advisable to prevent static damage. Ensure proper storage or handling of the caseback to avoid losing it.
Safely Accessing Snap-Back and Battery-Access Timepieces
Utilize a soft cloth to cushion the timepiece during the process. Position the watch face down on a flat, stable surface, ensuring a secure workspace.
Required Tools
| Tool | Description |
|---|---|
| Case Knife | A specialized tool designed to fit into the groove of snap-back cases. |
| Plastic Opener | A non-marring tool to prevent scratches or damage to the case. |
| Tweezers | For handling small components or the battery. |
Procedure for Snap-Back Models
Insert the case knife or plastic opener into the notch located on the side of the casing. Carefully apply pressure to gently pry the back off. Avoid excessive force to prevent damaging the case.
For battery-access models, identify the battery compartment which may have a small cover or tab. Slide the tool carefully to release any locking mechanisms. Once accessed, replace the battery while ensuring the orientation matches the previous one.
After replacing the back or battery, press down until you hear a click, indicating it is secure. Always check for tightness before wearing again. This method ensures integrity and functionality of the timepiece.
Common Mistakes to Avoid When Opening a Timepiece
Using excessive force can lead to irreversible damage. Always apply gentle pressure to avoid bending components or scratching surfaces.
Failing to secure the correct tools is another frequent error. Ensure you have the right equipment before beginning; using improvisational tools may cause misalignment or harm.
Neglecting to check for hidden screws or clasps can result in unnecessary effort and risk. Thoroughly examine the casing before attempting any removal.
Underestimating the importance of cleanliness may lead to contamination inside the device. Work in a dust-free environment and use gloves if possible.
Disregarding the order of assembly can complicate reassembly. Take notes or photographs during disassembly to remember the sequence of components.
Ignoring manufacturer instructions often results in mishaps. Always refer to specific guides for your model before proceeding.
Assuming all cases can be treated similarly can be misleading. Familiarize yourself with the specific type of casing before making an attempt.
- Use a soft surface to avoid scratches.
- Keep track of small parts to prevent loss.
- Don’t rush; take your time to ensure precision.
- Avoid operating in poorly lit areas to eliminate mistakes.