
 Ethan Cole
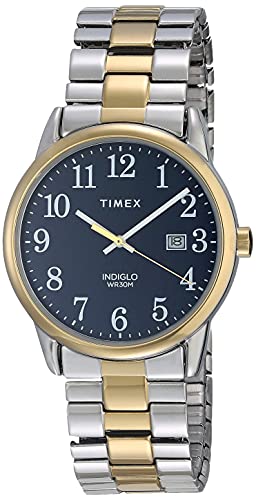
Align the case lugs with the strap’s spring bars. Carefully push the bar into the lug hole until you hear a click. Ensure that both ends of the spring bar are securely seated in place for proper fastening.
Use a spring bar tool to assist in the process if necessary. Insert the tool’s forked end between the strap and the case to compress the spring bar. Once compressed, fit the strap into the lug before releasing the tool for a firm hold.
Inspect the connection closely to verify stability. Gently tug on the band to confirm that it is tightly secured and won’t detouch during use. Regularly checking these connections can enhance the longevity of your accessory.
Steps to Reattach Your Timex Timepiece
Align the case with the band so the loops on each end match perfectly. Ensure the spring bar is compressed and slid into the designated slot.
Securing the Connection
After aligning, gently release the pressure on the spring bar to allow it to lock in place. You will hear a subtle click, confirming a secure fit. Inspect both sides to ensure the connections are even and not misaligned.


Final Check
Give a gentle tug on the band to verify stability. If there is any looseness, repeat the compression process until a snug fit is achieved. Regular checks can prolong the lifespan of your accessory.
Gather Required Tools for Reassembly
Before proceeding with the reassembly, ensure you have the following items at hand:
- Screwdriver Set: A small precision screwdriver set, ideally Phillips and flat-head, is necessary for opening the case and securing components.
- Case Back Opener: A specialized case wrench or tool will assist in removing and replacing the case back without causing damage.
- Tweezers: Fine-tipped tweezers are useful for handling delicate parts without risking scratches or misalignment.
- Watch Holder: A padded holder will stabilize the timepiece during reassembly, preventing it from slipping or scratching.
- Magnifying Glass: Use a magnifying lens to closely inspect small components, ensuring everything is in place.
- Clean Cloth: A lint-free cloth will help clean the casing and glass, ensuring a polished finish.
- Adhesive (if needed): Some movements may require a drop of watch adhesive to secure certain parts. Make sure it is specifically designed for watches.
Checklist for Safe Assembly
Verify that you have the necessary components such as the movement, hands, and case parts for your device. Double-checking the presence and condition of each item will aid in a smooth process.
Safety Gear
Consider wearing safety goggles to protect your eyes from any small debris or tools while working on the device. This added precaution ensures safety throughout the reassembly.
Identify the Watch Model for Specific Instructions
To ensure correct reassembly practices, determine the exact model of your timepiece. This will provide specific guidance tailored to your device.
Steps to Identify Your Model:
- Check the Back Cover: Most models have a specific model number engraved on the case back. This number is usually preceded by the word “Model” or “Caliber.”
- Reference the Original Packaging: If available, inspect the original box or manual, as model information is typically included.
- Visit the Official Website: Utilize Timex’s online resources. Navigate to the product section to match your design and features.
- Search Online: Use forums and watch collecting websites. Many enthusiasts can help identify models based on images.
Having the correct model allows for guidance on specific components and their assembly methods. Follow instructions tailored to your model to prevent damage and ensure longevity.
Common Timex Models:
- Weekender
- Expedition
- Ironman
- Marathon
Know your model to facilitate the reconstruction process smoothly and accurately. This small step can save time and resources during assembly.
Carefully Align the Case and Strap
Precise alignment of the casing and the band is crucial for proper reassembly. Follow these steps to ensure a seamless process:
- Examine the lugs on the case; these are the components where the strap will attach. Ensure they are clear of debris.
- Position the strap parallel to the lugs to verify proper fit. Each end of the strap should seamlessly slide into the designated openings.
- Align the pinholes of the strap with the lugs. Confirm that the holes match up evenly for a secure connection.
Securing the Connection
After aligning, follow these instructions to make the connections:
- Using the pins that were gathered earlier, insert them carefully into the holes. The pin’s tapered end should slide in smoothly to avoid damage.
- Press firmly until the pin clicks into place, which indicates a secure fit.
- Check the strap attachment by gently pulling on it to ensure nothing is loose.
This alignment and attachment method will provide a strong and aesthetic result, maintaining the integrity of the timepiece.
Securely Fasten the Watch Back in Place
Align the case and strap, ensuring proper contact between the components. Press gently while applying even pressure around the perimeter to avoid misalignment. Check for snapping sounds, which indicate a secure fit.
Utilize a Soft Cloth
Place a soft microfiber cloth on a flat surface before positioning the timepiece. This protects the surface and prevents scratches during the fastening process.
Inspect the Gasket
Before securing the shell, examine the rubber gasket for any wear or debris. A clean and intact gasket ensures water resistance and proper sealing during assembly.
For additional security, consider using a small plastic tool to assist in seating the case firmly without any risk of damage. Once everything is in place, adjust the clasp to ensure a snug fit on the wrist.
Test the Watch Functionality After Reassembly
Ensure the timepiece is operational before wearing it. Begin by checking the accuracy of the hands. Set the current time and observe for a few minutes to confirm they keep time correctly.
Check Additional Features
If the model has a date function, pull the crown to the first position and rotate it to adjust the date. Ensure the date transitions correctly the following day. If applicable, test any additional features, such as alarms or timers, according to the user manual.
Inspect for Water Resistance
If the timepiece is designed to be water-resistant, verify that the sealing has been properly executed during reassembly. Conduct a simple water test by placing it briefly under tap water if specified in the manual. Avoid prolonged exposure to ensure no leaks occur.
Perform Regular Maintenance for Longevity
Cleaning the timepiece regularly prevents dirt accumulation, which can hinder its mechanisms. Use a soft, lint-free cloth to gently wipe the surface. For deeper cleaning, a small brush can help dislodge particles from hard-to-reach areas.
Ensure the watch is water-resistant by checking gaskets and seals. Replace any worn components immediately to maintain its protective features. Avoid exposing the timekeeping device to extreme temperatures or prolonged sunlight, as these conditions can damage internal parts.
Consider periodic professional servicing at recommended intervals, typically every 3–5 years. This includes lubrication of internal components, which enhances accuracy and prevents wear.
Store the timepiece in a cool, dry place, ideally in a padded case, to protect it from knocks and scratches. Avoid hanging or placing it in direct contact with other items that could cause scratches.
| Maintenance Task | Frequency | Notes |
|---|---|---|
| Surface Cleaning | Weekly | Use a soft cloth to avoid scratches. |
| Deep Cleaning | Every 6 months | Utilize a brush for intricate areas. |
| Professional Servicing | Every 3-5 years | Replace worn gaskets or seals. |
| Storage | Always | Keep in a protective case. |
Monitor the timepiece’s accuracy regularly; should it deviate significantly, consult a specialist for adjustments. Following these practices promotes optimal performance and extends the lifespan of your timekeeping device.


