
 Ethan Cole

For a seamless experience in detaching the strap of your timekeeping device, the first step involves locating the spring bar mechanism on both sides of the band. A spring bar tool is essential for this task; it allows for the precise release of the bar, ensuring minimal risk of damage.
Carefully slide the end of the tool into the small recess near the strap connection, applying a gentle but firm pressure to compress the spring bar. Once compressed, the bar can easily be maneuvered out of the lug hole, detaching the band from the casing. Repeat this process on the opposite side to fully separate the strap.
Ensure a clean and organized workspace to prevent any small components from getting lost. After removing the band, inspect the connection points for any signs of wear or damage, which might require attention before reattaching a new or existing strap.
Instructions for Detaching the Band from Your Timepiece
Begin with a flat surface and a soft cloth to lay your accessory down gently. Examine the connectors at the end of the band closely, identifying the pins that secure the links to the main housing.
Tools Required
You will need a specialized spring bar tool or a small flathead screwdriver for this task. If you lack these tools, a sturdy paper clip can serve as a makeshift alternative.

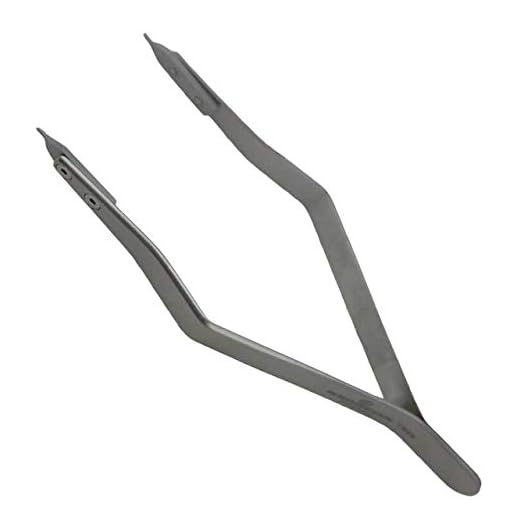
Step-by-Step Process
Using the spring bar tool, insert the pointed end into the small indentation on the side of the pin. Carefully push inward to compress the spring bar, then simultaneously pull the band away from the casing. Repeat the process on the opposite side. If you encounter resistance, ensure you are pressing firmly enough to engage the mechanism.
Once both ends are free, gently lift the band away from the timepiece body. Store the band safely for future use or replacement.
Identify the Type of Sleeve Used in Your Pulsar Timepiece
Determining the specific type of casing utilized in your Pulsar device is essential for any adjustments or repairs. Begin by examining the visible components closely.
Types of Casings
- Snap-On: These casings typically click into place, offering ease of access for maintenance. Check for small grooves or tabs around the perimeter.
- Threaded: This design features a screw mechanism. Look for threading on the inner sides; turning counterclockwise usually loosens it.
- Push-Fit: Similar to snap-on designs, but with more pressure required to detach. Push or lift gently to evaluate its grip.
- Spring Bar: Often used in designs with metal bands. Inspect the connection points for small rods that can be depressed to release the attachment.
Checking the Manual
Your watch manual may provide specific details regarding the casing type. Refer to it for guidance tailored to your model.
If unavailable, online forums or Pulsar’s official website can be valuable resources to identify your timepiece’s casing style.
Gather Necessary Tools for Sleeve Removal
Acquire a spring bar tool for efficient pin release. This instrument typically features a pointed end for engagement and a forked side for leverage. A pair of fine-tipped pliers will assist in any delicate maneuvers without risking damage. Additionally, prepare a soft cloth to protect the surface and avoid scratches during the process.
Optional Tools
A plastic case opener can be beneficial for models requiring access beneath the casing. Tweezers may also aid in handling small components. A clean workspace ensures minimal disruptions and enhances precision.
Safety Precautions
Wearing safety goggles is advisable to protect eyes from flying debris, especially when dealing with springs. Ensure that your hands are dry to maintain a firm grip on intricate pieces.
Locate the Sleeve Removal Mechanism on the Watch
Examine the rear casing for specific notches or grooves indicative of a release mechanism. These points often accommodate tools designed for accessing the fastening system.
Utilize a magnifying glass if necessary to identify subtle differences in design that may indicate a latch or clip. Pay attention to the symmetry of these features, as they can offer hints on how to disengage them properly.
In certain models, the sleeve attachment may have small, recessed buttons that need to be pressed simultaneously to facilitate the disengagement process. Ensure the area is well-lit to spot these critical components easily.
Refer to your model’s manual if available, as it often contains diagrams or explanations about the precise location of the release mechanism.
When inspecting the side of the casing, look for any tiny screws that might be securing the sleeve in place. A jeweler’s screwdriver set will be beneficial for this exploration.
Keep a close eye on the alignment of parts. Misalignment could complicate the process and potentially lead to damage if excessive force is applied.
| Part | Description |
|---|---|
| Rear Casing | Look for notches or grooves indicating a release mechanism. |
| Buttons | Recessed buttons that may need simultaneous pressing for release. |
| Screws | Tiny screws securing the attachment; require jeweler’s screwdriver. |
| Alignment | Check alignment to avoid damage during the process. |
Carefully Extract the Cover Without Damaging the Timepiece
Utilize a soft cloth to create a cushion for the timepiece. This will prevent scratches and dings during the handling process.
Apply gentle pressure around the edges of the cover using a plastic tool or a case opening knife. Ensure the tool is inserted evenly to avoid bending or cracking the material. Avoid using metal tools as they can cause irreversible damage.
If the cover resists, check for any hidden screws or clips holding it in place. Removing these components before applying further pressure can facilitate a smooth extraction.
Inspect for Resistance
Gently wiggle the cover while applying light pressure. If it feels stuck, reassess your approach rather than forcing it. Sometimes, applying mild heat from a hairdryer for a few seconds can help loosen adhesives without harming the watch.
Final Steps for Safe Handling
Once the cover is released, check the surrounding areas for dust or debris before continuing with maintenance or replacement. Keeping the area clean will enhance the lifespan and functionality of the device moving forward.
Inspect and Clean the Area After Sleeve Removal
Immediately check the exposed section of the timepiece. Look for any residue, dirt, or small particles that may have accumulated during the disassembly. Use a soft brush or a lint-free cloth to gently wipe the area, ensuring that no scratches are inflicted on the surface.
Detailed Cleaning Steps
If traces of oil or grime are present, apply a small amount of watch-safe cleaning solution to the cloth. Carefully clean the watch’s body and surrounding parts, taking care not to let any liquid seep into the internal mechanisms. Utilize a toothpick or a soft, pointed tool to address any dirt lodged in small crevices.
Final Inspection
After cleaning, conduct a thorough inspection. Verify that there are no obstructions in the newly uncovered area and confirm that all components are secure. This ensures the longevity and proper functioning of the timepiece. If any residues persist, repeat the cleaning process with caution.
Reassemble the Timepiece and Test for Proper Function
Begin reassembly by carefully positioning the components in their original places. Ensure that the internal mechanism aligns correctly with the casing to prevent any misalignment that could affect functionality.
Secure All Parts
Once alignment is confirmed, gently press or fit the casing back together, making sure each segment clicks into place securely. If applicable, reinsert screws or fasteners, tightening them evenly to maintain even pressure across the casing.
Conduct a Functionality Check
After reassembly, it’s crucial to check the accuracy and performance. Set the correct time and observe whether the hands move smoothly without obstruction. Test any additional features, such as chronographs or alarms, ensuring they operate as intended.
Finally, if everything functions correctly, wear the timepiece for a short period to verify comfort and performance before regular use. This ensures that reassembly was successful and the unit operates smoothly.
FAQ:
What tools do I need to remove the sleeve from a Pulsar wrist watch?
To remove the sleeve from your Pulsar wrist watch, you’ll typically need a few basic tools: a small flathead screwdriver, a spring bar tool (or a pair of tweezers), and possibly a soft cloth to protect the watch’s surface. The spring bar tool is particularly useful for releasing the spring bars that hold the sleeve in place. Make sure to work in a well-lit area to avoid losing any small parts during the process.


