
 Ethan Cole

To safely handle the radioactive luminous material on your timepiece, gather necessary tools including a soft brush, tweezers, and sealed containers. This ensures a controlled environment for the entire process. Proceed with caution to minimize exposure.
Begin by securing the timepiece in a well-ventilated area. With the soft brush, gently dislodge any loose remnants without applying excessive force, as this can damage the surface beneath. Use tweezers to carefully extract larger pieces of the luminous material, placing them directly into a sealed container to prevent dispersal.
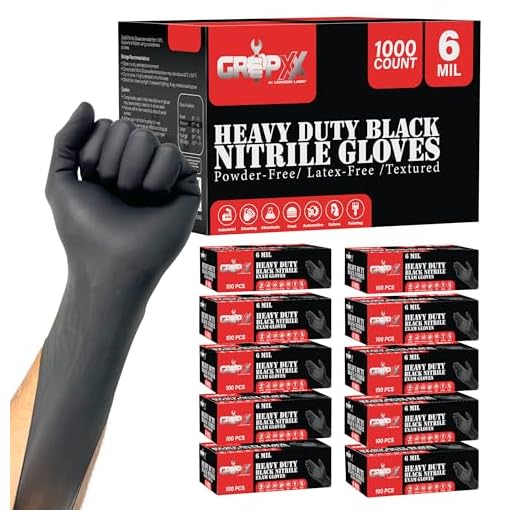
After removal, clean the surface using a microfiber cloth dampened with isopropyl alcohol. This will eliminate traces of residue without harming the underlying components. Always wear gloves and consider using a mask to further protect against dust or particles during the cleaning phase.

Dispose of the extracted materials according to local regulations regarding hazardous waste. It’s crucial to adhere to safety guidelines to mitigate any health risks associated with the handling of radioactive substances.
Identifying the Presence of Tritium Paint on Your Watch
Observe if the luminous markers on the dial and hands have a greenish hue; this can indicate the usage of a radioactive substance. Examine under UV light; tritium exhibits a distinct glow in the dark, which may help confirm its presence.
Check the age of the timepiece; models produced since the 1960s often feature this luminescent material. Reference the manufacturer’s specifications or watch forums for specific models known to contain it.
Lightly scrape a small area on the luminescent sections with a plastic tool. If it crumbles easily and has a powdery texture, it may suggest the presence of such materials, as they often degrade over time.
If the luminescenсe appears uneven or faded in comparison to newer luminescent materials like Super-LumiNova, this can be a sign of the older, radioactive type.
Always verify with a professional if uncertain, as proper identification may require expertise. Seek assistance if there are any doubts regarding the safety of handling your timepiece.
Safety Precautions Before Starting the Removal Process
Wear protective gloves. This will prevent skin contact with any substances used during the procedure.
Ensure proper ventilation in the working area. Open windows or use a fan to maintain airflow and dissipate any potential fumes.
Utilize safety goggles to protect your eyes from dust and debris that may arise during the task.
Preparation of Tools and Materials
Gather all necessary tools beforehand to minimize distractions. Common items include a micro screwdriver set, a pair of tweezers, and a soft cloth.
Use a dust mask if you’re sensitive to particulates, as this can help filter out any inhalable materials.
Handling Materials Safely
Keep an emergency kit nearby. This should contain a first aid kit and any necessary contact information for poison control.
Never attempt the task with broken tools. Inspect all equipment for damage before starting to avoid accidents.
Follow disposal guidelines for the leftover materials to ensure environmentally safe practices post-process.
Tools and Materials Needed for Removing Tritium Paint
To successfully carry out the task of eliminating luminous markings from your timepiece, gather the following equipment:
| Tool/Material | Purpose |
|---|---|
| Tweezers | For precise handling of small components. |
| Magnifying Glass | To closely inspect the area for delicate operations. |
| Protective Gloves | To shield hands from potential irritants. |
| Masking Tape | To cover non-targeted areas, preventing accidental damage. |
| Microfiber Cloth | For cleaning surfaces without scratching. |
| Small Brush | For gentle cleaning of fine details. |
| Isopropyl Alcohol | For sanitizing surfaces post-operation. |
| Small Utility Knife or Blade | For carefully scraping away markings. |
| Fine Sandpaper | For smoothing out any rough areas. |
| Sealant (Optional) | To protect surfaces after completion, if desired. |
Ensure all items are in good condition and suitable for use to avoid damaging the mechanism. Proper preparation of tools leads to a smoother and more controlled process.
Step-by-step guide to carefully eliminate luminescent material
Prepare your workspace by ensuring it is clean and well-lit. A dedicated area will help prevent contamination of your timepiece.
1. Secure the timepiece
Place the device on a soft surface to avoid scratches. Use a non-slip mat or cloth to keep it steady.
2. Protective measures
Wear gloves to prevent skin contact. Safety goggles are recommended to avoid accidental splashes.
3. Tool setup
Gather the following:
- Precision scalpel or blade
- Soft brush
- Isopropyl alcohol
- Cotton swabs
- Vacuum or blower (optional)
4. Application of solvent
Dampen a cotton swab with isopropyl alcohol. Gently apply it to the areas of interest, allowing it to sit momentarily to soften the adhesive beneath the luminescent material.
5. Gentle scraping
Using the precision blade, carefully scrape the softened substance. Maintain a low angle to avoid damaging the underlying surface. Exercise caution as you proceed.
6. Debris removal
Employ a soft brush or blower to clear away any remaining particles. This ensures the section remains clean and free of debris.
7. Final clean-up
Use a clean cotton swab with isopropyl alcohol for a final wipe-down of the area. This step guarantees no residue remains.
Disposing of tritium paint waste responsibly
Seal all waste materials containing radioactive substances in appropriate containers designed for hazardous materials. Choose thick plastic or glass jars with tight-fitting lids. Label each container clearly to indicate the contents and associated risks.
Contact local waste management authorities to determine the permitted disposal sites for radioactive waste. Municipal guidelines often provide specific instructions for hazardous materials, including designated drop-off locations.
Do not dispose of any radioactive waste in regular trash or recycling bins. It poses a significant risk to both human health and the environment. Proper disposal is a legal obligation and a key element of responsible stewardship.
Consider collaborating with specialized companies that handle hazardous material disposal. Many organizations are equipped to manage radioactive waste safely and comply with current regulations.
Maintain records of disposal actions, including dates, types of waste, and disposal methods. This documentation may be important for compliance with regulatory bodies.



