Ethan Cole

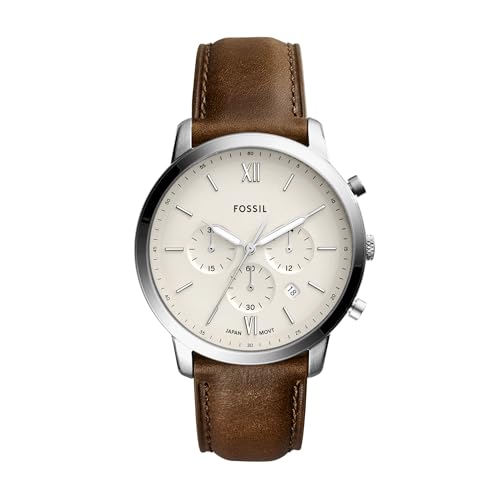
For an effortless detachment of the band from your timepiece, first secure a clean and well-lit workspace. Utilize a soft cloth to protect the surface beneath your device. Gather the necessary tools: a spring bar tool and a small screwdriver tailored for watch components.
Carefully inspect the lugs of your timekeeper, where the band meets the case. Locate the small notches on the spring bars that may be concealed within the lugs. Using the pointed end of your spring bar tool, gently push inward on the notch to release the tension, allowing the bar to disengage smoothly.


Once one side releases, repeat the process on the opposite side. After both ends are free, the band can be effortlessly lifted away from the case. Store any removed components securely for future use or replacement.
Removing the Band from a Timepiece
Use a spring bar tool to detach the band. Carefully insert the tool into the grooves of the spring bars located at the lugs where the band connects to the case. Push the spring bar inward to release it from the lug. Repeat this process on the opposite side to completely remove the band.
Steps for Safe Disassembly
- Place the timepiece on a soft, clean surface to prevent scratches.
- Ensure the spring bar tool is compatible with the size of the spring bars.
- Apply gentle pressure while pushing the spring bar to avoid damaging it.
Post-Removal Recommendations
- Inspect the watch and band for any signs of wear.
- Clean the lugs and areas around the attachment points before reassembling.
- Consider using a soft cloth to polish the metal surfaces.
Identify the Type of Timepiece Sleeve
Assess whether the timepiece features a metal, leather, or synthetic sleeve. Each type has unique characteristics that influence removal techniques. For metal variants, check for snap or pin mechanisms. Leather options may involve stitching or loops, while synthetic styles might use clasps or Velcro.
Metal Sleeve Identification
Examine for any visible screws or pins. If screws are present, a small screwdriver will be needed to detach. Pins may require a gentle push to release the sleeve from the casing. Ensure careful handling to avoid damaging the finish.
Leather and Synthetic Sleeve Identification
Look for stitching details or integrated loops that indicate the type of attachment. Leather may also display a buckle or snap closure; carefully unfasten these components. For synthetic materials, inspect for any Velcro patches which can be easily pulled apart without additional tools.
Gather Necessary Tools for Sleeve Removal
Prepare the following tools for a seamless disassembly:
- Watch Tool Kit: A basic set includes specialized instruments like case openers, spring bar tools, and pin pushers.
- Jeweler’s Screwdriver: A collection of small screwdrivers will assist in loosening any screws securing the components.
- Plastic Tweezers: Use these to handle delicate parts without causing scratches or damage.
- Soft Cloth: Keep a lint-free cloth handy to protect the watch face and prevent scratches during the process.
- Magnifying Glass: Helpful for inspecting tiny parts and ensuring you don’t miss any small components.
- Light Source: A bright lamp or flashlight will enhance visibility, allowing for precision in working with intricate mechanisms.
Safety Gear
Consider wearing safety glasses to protect your eyes from any potential flying parts during disassembly. If allergies are a concern, use a dust mask.
Workspace Preparation
Set up your workspace on a clean, flat surface. Ensure that you have adequate space to organize all components without losing any pieces.
Accessing the Sleeve: Step-by-Step Instructions
To access the cover, follow these precise steps to ensure a smooth process.
1. Prepare the Work Area
Choose a well-lit, flat surface. Use a soft cloth to eliminate the risk of scratches during the procedure.
2. Remove the Case Back
Locate the case back, which is typically secured with screws or a snap-in design. If screws are present, use a precision screwdriver, turning them counterclockwise to loosen. For snap backs, gently pry the cover off using a case knife.
3. Detach the Movement
Once the case back is removed, carefully take out the movement. Look for any securing components and release them without applying excessive force.
4. Locate Sleeve Attachment Points
Inside, find the attachment points of the sleeve. These might be clips or screws located at various positions depending on the model.
5. Disconnect the Sleeve
Using the appropriate tool, gently detach the sleeve from its anchor points. Be cautious to avoid damaging any nearby components.
6. Inspect Components
Examine the sleeve and surrounding parts for wear or issues. This step is essential for maintenance and future assembly.
7. Reassembly or Replacement
If replacing the sleeve, position the new part correctly before securing it. If reassembling the original, ensure all components are aligned properly before placing the movement back into the case.
Tools Required
| Tool | Purpose |
|---|---|
| Precision Screwdriver | To remove screws from the case back. |
| Case Knife | For prying open snap-back cases. |
| Plastic Tweezers | To handle small components without scratching. |
| Soft Cloth | To protect surfaces and components from scratches. |
| Magnifying Glass | To inspect small or intricate parts. |
Follow these steps methodically for a successful operation without damaging the watch.
Removing the Sleeve Without Damage
To detach the casing without harming it or the internal mechanism, a gentle yet firm approach is crucial. Begin by ensuring the timepiece is completely powered down, especially if it features any electronic components.
Use Proper Leverage
Utilize a plastic or wooden tool instead of metal to create leverage. This minimizes the risk of scratching or denting the surface. Gently wedge the tool between the case and the sleeve, applying light pressure until the connection loosens. Avoid excessive force, which could crack the casing.
Warm the Sleeve Slightly
If the connection appears stubborn, applying gentle heat can help. Use a hairdryer on a low setting to warm the area around the sleeve. This can expand the material slightly, making it easier to detach. Maintain a safe distance to prevent overheating any delicate components.
After loosening, carefully pull the sleeve away from the casing, ensuring no wires or delicate parts are snagged during the process. If resistance is met, assess and adjust your technique rather than forcing it, which may cause damage.
Once removed, inspect both the sleeve and the casing for any signs of wear or damage. Proper handling during this process preserves the integrity of the timekeeping device.
Cleaning the Timepiece After Sleeve Removal
Immediately after detaching the cuff, clean the surface of the timepiece to remove any dust, oils, or residues. Use a microfiber cloth to gently wipe the case and strap. For stubborn spots, slightly dampen the cloth with water or a specialized watch cleaning solution. Avoid harsh chemicals that could damage the finish.
Detailing the Glass
If the crystal is smudged or scratched, a specialized glass cleaner can help restore its clarity. Apply a small amount of the cleaner to the microfiber cloth, not directly on the glass. Gently rub in circular motions to avoid streaks.
Inspecting and Cleaning the Mechanism
After the exterior is clean, inspect the mechanism for any dust accumulation. A soft brush or compressed air can be used to clear debris from small crevices. Ensure the timepiece is dry before reassembling any parts or reattaching the strap.
Reattaching or Replacing the Sleeve: What to Consider
Evaluate the material of the sleeve before reattaching or replacing it. Options include leather, metal, or silicone. Ensure compatibility with the timepiece and consider both aesthetics and comfort for wear.
Check for signs of wear or damage on the original sleeve. If it’s frayed or broken, opting for replacement is advisable. If reattaching, ensure that the fasteners or connectors are intact and functional to avoid future complications.
Take note of the watch’s design and style. A new sleeve should complement the overall look. If choosing a custom or unique sleeve, verify that it fits securely and aligns with the dial and casing properly.
When reattaching, follow the reverse steps of removal carefully to guarantee a snug fit. Utilize the appropriate tools to secure connections without overtightening, which could cause damage.
Lastly, consider the longevity of the sleeve material. Some materials may require more maintenance, such as conditioning or polishing, while others may provide greater durability with minimal upkeep. Balance aesthetics and practicality based on your lifestyle needs.