
 Ethan Cole

To detach the band from your timepiece, identify the type of connection used. Many timepieces feature spring bars, which can be accessed using a spring bar tool or a small flathead screwdriver. Position the tool under the spring bar and gently push to release it from the lug. This technique allows for easy separation of the band from the case.
If your accessory employs screws, locate the tiny screws on either side of the lugs. Utilize a precision screwdriver that matches the screw head size to carefully unscrew them. Ensure you have a stable surface to avoid losing any parts during this process.
For models with a snap-on mechanism, press gently on the lugs with your thumb to loosen the connection. This may require a bit of force, but be cautious not to damage the lugs or the band. Once loosened, the strap should slide out easily.
Always remember to keep track of any detached components, as this will assist in reassembly or allow for future modifications to your fashionable accessory.
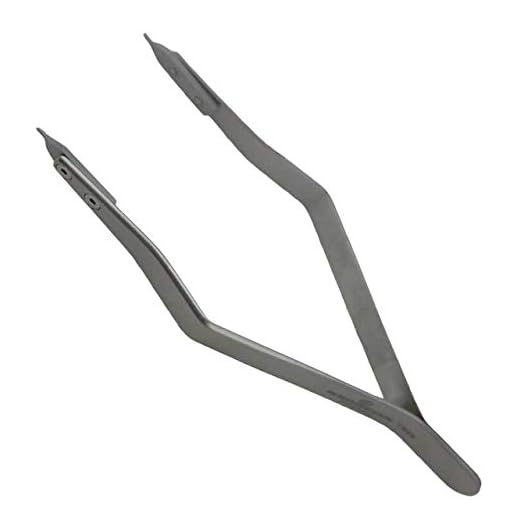

Guidelines for Releasing a Timepiece Band
Utilize a precise tool, such as a spring bar tool or a small flathead screwdriver, to disengage the pins that secure the band. Position the tool in the gap between the band and the case, applying gentle pressure towards the spring bar. This will compress the bar, allowing you to extract it from the hole.
Before proceeding, inspect the lugs closely. Some timepieces feature unique fittings or screws requiring specialty tools. If screws are present, a micro screwdriver set may be necessary to remove them carefully without damage.
A clean, well-lit workspace is essential. Lay out a soft cloth beneath the timepiece to prevent scratches or loss of small components. Taking a photo of the current setup can aid in reassembly.
| Tool | Function |
|---|---|
| Spring Bar Tool | Compresses bar for easy removal |
| Flathead Screwdriver | Helps in prying apart attachment points |
| Micro Screwdriver Set | Removes screws, if applicable |
Check for any signs of wear or malfunction on the pins after removal. If any are damaged, replacing them is advisable to ensure the integrity of the attachment.
Lastly, after detaching, store the timepiece in a safe place. Ensure that any components are organized to facilitate seamless reattachment later.
Choosing the Right Tools for Removing Links
For link removal, a link pin pusher is essential. This device allows precise alignment and controlled pressure, ensuring the pin does not bend or break during extraction. Look for models with multiple size tips to accommodate various link sizes.
Additional Tools to Consider
A fine-tipped screwdriver set is helpful for watches with screw-in links. A magnifying glass aids visibility, especially when dealing with tiny components. Adjusting pliers can assist in manipulating stubborn links without damaging them.
Safety Measures
Use a soft surface or a dedicated mat to prevent scratches. Consider wearing gloves to avoid fingerprints on polished surfaces. A small funnel or container is also useful for keeping screws and pins organized during the process.
Step-by-Step Guide to Unscrewing Links
Prepare the area by using a soft cloth to avoid scratches on the surface where you will work. Place the timepiece face-down on the cloth.
1. Identify the Screws
Examine the straps for tiny screws securing the links. Count the number of links you want to remove to ensure a balanced fit.
2. Secure the Bracelet
Stabilize the band with a holder or cloth, preventing movement during the process.
3. Select the Correct Driver Tool
- Use a small screwdriver that fits snugly into the screw recesses.
- A 1.6mm or 1.4mm screwdriver is often suitable for most timepieces.
4. Remove the Screws
Gently insert the driver into the screw and turn counterclockwise until it loosens. Avoid applying excessive force to prevent damage.
5. Detach the Link
Once the screws are out, carefully remove the link by pulling it off the adjoining pieces.
6. Reassemble
Realign the remaining pieces and insert the screws back into place. Tighten without overtightening, ensuring that they are secure but not stripped.
7. Final Check
Test the integrity of the strap by applying gentle pressure. Ensure everything is securely fastened before wearing the item again.
Tips for Preventing Damage to Your Timepiece
Always store your device in a soft pouch or dedicated case to avoid scratches and impacts. Avoid exposing it to extreme temperatures or direct sunlight, which can cause internal components to malfunction.
Maintain Cleanliness
Regularly clean the exterior with a microfiber cloth to remove dirt and sweat. For deeper cleaning, consider a slightly damp cloth with mild soap, ensuring no moisture enters any openings.
Check for Water Resistance
If your accessory is water-resistant, routinely examine the seals to ensure they’re intact, especially before exposure to water. Consider having it tested for water resistance periodically by a professional.
Identifying Different Types of Watch Screws
Begin by examining the screws on the bracelet or case. Look for distinguishing features such as shape, size, and head design. Some screws have flat heads, while others might be rounded or even specialized, like those with a star-shaped design.
Types of Screws
Common screws include Phillips, flathead, and Torx types. Phillips screws have a cross shape, whereas flatheads are designed for a straight screwdriver. Torx screws, identified by their star shape, offer better grip and torque. Verify their type before choosing the right tool.
Material and Finish
Check the materials used for the screws; stainless steel is common in luxury models, while plastic screws may be found in less expensive variants. The finish can vary from polished to brushed, affecting your choice of tools and technique. Bright finishes may require more care to avoid scratches.
Take note of the screws’ threading; some might have standard threading, while others feature finer threads. Understanding these details contributes to a smoother experience when adjusting or changing components.
What to Do if You Encounter Stuck Screws
If faced with immovable fasteners during link removal, apply a penetrating oil, like WD-40, directly to the affected area. Allow it to sit for several minutes to ease the tension. For additional grip, utilize rubber bands or silicone patches on your tool to minimize slippage.
Heat Application
If lubrication proves ineffective, consider gently applying heat. A hairdryer or heat gun can help expand the metal slightly, potentially loosening the threads. Ensure not to overheat, as excessive heat may damage components.
Alternative Solutions
Employ pliers or a grip tool for enhanced leverage if the screws remain stubborn. In cases of severe resistance, a screw extractor might be necessary; it creates an inward grip that can adequately handle difficult fasteners. Always prioritize caution to prevent stripping the screw heads.



