
 Ethan Cole

Secure a small, flat tool. A precision screwdriver or a knife’s blade can work effectively. This will assist in dislodging the pin that connects the link to the clasp, allowing for easy removal.
Next, locate the pin holes. Usually positioned on the underside of the links, these are essential for disassembling the bracelet. Align your tool with the pin hole for an accurate approach.
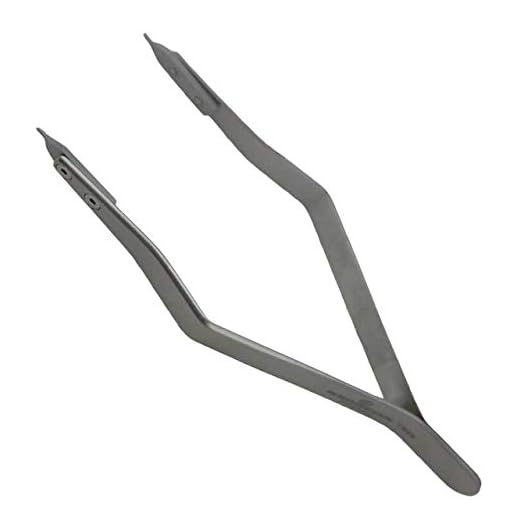
Apply gentle pressure while pushing the pin out. It may require some strength, but be cautious to avoid damaging the link. Once the pin is released, the links may separate effortlessly.
Carefully detach additional segments if necessary. This process may be repeated if you aim to resize the bracelet further for optimal comfort on your wrist.
Finally, reassemble the parts after modifying the length. Ensure the pin is securely positioned to prevent any accidental disconnection. Regular maintenance checks will keep your accessory intact.
Removing a Seiko Diver’s Timepiece Strap
Utilize a spring bar tool to compress the spring bars on either side of the attachment points. Insert the tool into the small slots between the strap and the case. Gently push inward while lifting the strap away from the lugs. Take care to perform this on both sides to completely detach the strap.
If it’s challenging to access, consider using a small screwdriver or a tweezer with a pointed end, ensuring you don’t damage the case. Keep the removed components in a safe place to prevent loss.
For replacement, align the new strap with the lugs. Compress the spring bars and insert them back into the designated holes until a click is heard, indicating they are securely in place. Check the stability before wearing.
Gather Necessary Tools for Band Removal
Prepare a spring bar tool to ease the process of detaching the links. This tool has a forked end that helps release the spring bars securely holding the straps in place, minimizing damage.
A set of fine-tipped pliers can provide additional grip while working with delicate components. Ensure the pliers have soft jaws to avoid scratching the surface of the case or the strap itself.
Recommended Tools
| Tool | Purpose |
|---|---|
| Spring Bar Tool | Removes and installs spring bars |
| Fine-Tipped Pliers | Grips and handles small parts |
| Cotton Cloth | Protects from scratches and absorbs oils |
| Screwdriver Set | Adjusts any screws used in the installation |
Additionally, a soft cotton cloth is beneficial for wiping the area and protecting your timepiece from scratches during the removal process. If any screws are present in the arrangement, a small screwdriver set will assist in loosening them.
Identify the Type of Band on Your Seiko Timepiece
Examine the characteristics of your timepiece to determine the band type. Bands are typically classified into few categories:
- Stainless Steel: Known for durability and resistance to corrosion. Check for links that can be added or removed.
- Rubber: Often used for sporty models, these are flexible and water-resistant. Look for adjustable sections or clips.
- Leather: Offers a classic look with various textures. Inspect the stitching and buckle style for the type of closure.
- Nylon or Fabric: Lightweight and breathable, these often feature a loop and hook mechanism or standard buckle.
Additionally, observe the connection points where the band meets the case. Different types may have specific pin or spring bar mechanisms:
- Spring Bars: Common in metal and rubber types, press the tabs inward to detach.
- End Links: Part of solid bands, these may require unscrewing or levers for removal.
- Quick-Release: Look for levers on either side for easy removal without tools.
Identifying the band type will facilitate proper removal and replacement measures. Assess your model closely and refer to the manufacturer’s documentation for precise details.
Locate the Pin or Spring Bar for Band Detachment
Examine the area where the straps connect to the case. Look closely for small holes or indentations on the side of the lugs. These are typically where the pins or spring bars are positioned.
Identify the Mechanism
Most straps utilize spring bars, small metal rods that secure the straps in place. Utilizing a magnifying glass can help in spotting these components more clearly. If your setup features screws instead, you will need an appropriate screwdriver to access them.
Using a Tool
A spring bar tool is ideal for this task. Insert its forked end into the small openings next to the strap and gently press to release the tension on the spring bar. Once disengaged, the strap will easily detach from the casing.
Use Appropriate Technique to Remove the Band
Position the timepiece face down on a soft cloth to prevent scratches. Firmly grip the strap while inserting a spring bar tool into the slot adjacent to the pin. Apply gentle pressure to compress the spring bar and release it from the lug. Smoothly pull the strap away once the pin detaches. Repeat the process for the opposite end, ensuring even handling to maintain alignment.
For leather or fabric straps, look for a buckle or clasp mechanism. Open it entirely to release tension before sliding the strap out. In metal links, locate the small arrows indicating the direction for pin removal. Use a small hammer to gently tap the pin through, allowing for smooth extraction.
Consistency in technique is crucial for protecting the attachment points and preserving the integrity of materials. Maintain a delicate touch throughout to prevent unexpected damage.
Inspect the Band and Watch Case for Damage
Examine the metal or material of the strap for scratches, dents, or signs of wear. Check the joints where the strap connects to the casing for cracks or looseness. Inspect the lugs and case for any signs of corrosion or damage that may affect the overall integrity. Ensure the spring bars are not bent or compromised as this could lead to eventual failure. Make sure the attachment points are secure; any instability may require immediate attention before proceeding with removal.
Reattach or Replace the Wrist Band as Needed
Position the new or reattached strap so that it is aligned with the lugs of the case. Insert one end of the spring bar into the designated hole, ensuring a snug fit. Use a spring bar tool to compress the other end of the bar, allowing it to slip into the opposite hole. Release the tool gently to secure the spring bar in place.
If you’re replacing the entire strap, ensure compatibility with the watch model. Double-check that the material and width correspond appropriately for a secure fit. Leather, rubber, or metal options may vary, so choose one that complements your style and usage.
After reattachment, visually inspect the junction points between the strap and case for stability. Gently pull on the band to confirm it is secure. For added assurance, consider consulting the manufacturer’s specifications or visiting a professional for difficult fittings.
Should the original strap show wear, opt for a replacement that meets your aesthetic and functional requirements. Ensure that any new attachment incorporates adjustable length for comfort.



