Ethan Cole

To secure a snug fit, locate the adjustment pins along the bracelet. These small components allow you to modify the length of the band with minimal effort.
Using a small tool, such as a spring bar tool or a pushpin, gently press the pin to loosen it. Remove the pin completely for significant length adjustment or shift it to a different link for minor changes. Ensure that the adjustment is symmetrical on both sides of the accessory for optimal balance.
After modifying the length, reinsert the pin firmly to prevent any slippage. It’s crucial to confirm that all components are tightly secured before wearing the item again, ensuring comfort and preventing accidental detachment during use.
Adjusting the Metal Closure on Timepieces
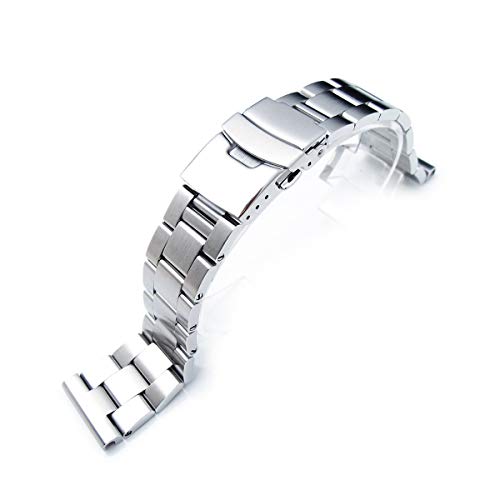
Begin by determining the current clasp settings. Use a small tool, like a screwdriver or a pin, to detach the metal connection. Gently push the pin from inside to outside, removing it from one side. This permits the separation of segments.
Next, evaluate the number of links required for a snug fit. Typically, removing two to three links makes a significant difference in fit. Select the desired section for removal and repeat the process of pin extraction.

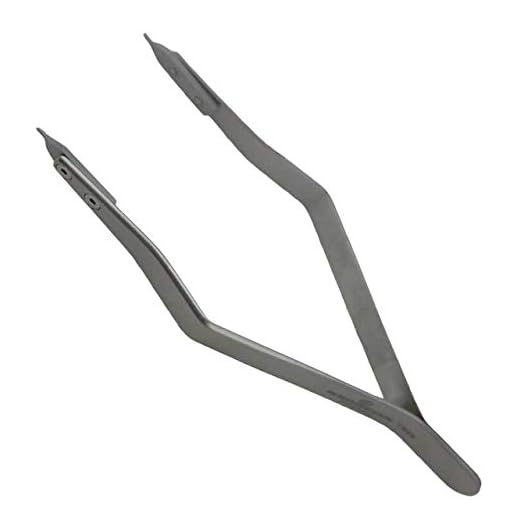
After adjusting, reattach the clasp by aligning the pin holes. Ensure the pin is pushed back through both sides until it clicks into place, securing the segments together.
Double-check the adjustment by fastening the closure on your limb. If it feels loose or overly tight, consider a few additional modifications.
| Tools Needed | Description |
|---|---|
| Screwdriver or Pin | For removing and securing the links. |
| Flat Surface | A stable area to work on without distractions. |
| Measuring Tape | To measure wrist size for precise fit. |
After finalizing the modifications, remember to clean the hardware. Use a soft cloth to remove dust and fingerprints to maintain a polished appearance.
Identifying the Type of Latch on Your Timepiece
Begin by examining the mechanism closely. Look for visible features that distinguish various designs. Common types include deployment clasps, butterfly clasps, and traditional pin buckles. Each type serves a different function and is adjusted differently.
For a deployment clasp, observe if there are one or two buttons on the side; these release the mechanism. The butterfly version will have two sections that open outward, resembling butterfly wings. If a pin buckle is present, it typically involves a simple metal pin fitting into a hole on the band for securing.
Check the underside of the piece for branding or model numbers, which can also provide insight into the specific design used. Often, manufacturers leave identifying marks that can guide you to the correct adjustment method.
Take note of the material; options like leather or fabric will influence how the clasp functions. For metal variants, ensure there are no signs of wear that could affect performance.
Utilize a magnifying glass for precise identification if necessary. This aids in clarifying intricate details that are otherwise hard to see. Understanding the type will streamline the modification process, making it straightforward and efficient.
Tools Needed for Latch Adjustment
Begin with a spring bar tool or a pin pusher. These instruments are vital for changing the size of the metal band without causing damage. A magnifying glass may assist in viewing small components during the process.
Additional Tools
A set of fine tweezers will help manipulate tiny parts safely. A flathead screwdriver can be useful for loosening screws, while a soft cloth will protect the surface of the timepiece during adjustments.
Safety Gear
To prevent scratches on the casing or your workspace, consider using a watchmaker’s mat or a soft cushion. Wearing safety goggles can protect your eyes from any small flying fragments during the procedure.
Step-by-Step Guide to Adjusting the Latch
Determine the number of links required for a comfortable fit. Wear the timepiece on your wrist and assess how it feels; the goal is a secure fit without excessive tightness.
Removing Links
Identify the pins holding the links together. Use the appropriate tool to push or tap out the pins carefully. Remove links as needed to achieve the desired length. Ensure that both sides of the band are balanced after removing links.
Reassembling the Band
Once the correct number of links is removed, reinsert the pins to secure the remaining links. Gently push the pins back in, ensuring they are flush with the band. Test the closure and movement to confirm stability before wearing.
Common Issues and Troubleshooting During Adjustment
Difficulty in securing the closure often arises. Check for any debris or obstruction in the mechanism that may hinder proper function.
Misalignment can result in improper locking. Ensure the elements are aligned correctly before testing the fit. Sometimes, parts may shift during adjustment, necessitating a reevaluation.
Over-tightening can lead to deformity or damage. Apply gentle pressure while ensuring a snug fit. If resistance is encountered, reassess the alignment rather than forcing the component.
Common Problems
- Inconsistent function: Inspect for worn components or dirt accumulation.
- Difficulty opening or closing: Lubrication may be required to ease movement.
- Parts not staying together: Ensure the retaining mechanism is fully engaged.
Troubleshooting Steps
- Disassemble the components to inspect for visible damage.
- Clean all moving parts using a soft cloth and appropriate cleaning solution.
- Reassemble carefully, verifying each component is seated correctly.
- Test the closure after reassembly to ensure functionality.
Maintenance Tips for Keeping Your Timepiece Fastener Functional
Regular cleaning is essential. Use a soft, lint-free cloth to wipe off dust and moisture. A small brush can help remove debris in hard-to-reach areas.
Apply a drop of silicone lubricant to the moving parts occasionally. This prevents friction and ensures smooth functionality. Be careful not to use excessive amounts; a little goes a long way.
Check for signs of wear periodically. Inspect for any cracks, chips or bending. Address these issues promptly to avoid further damage.
Store your timepiece in a dry place at room temperature. Extreme temperatures or humidity can adversely affect the integrity of the components.
Service your item according to the manufacturer’s recommendations. Professional maintenance ensures parts are functioning correctly and extends the lifespan of the accessory.
If you wear it frequently, make it a habit to inspect the closing mechanism regularly. Any stiffness or unusual sounds may indicate a need for immediate attention.
Keep an eye on stress points where connections meet. These areas often experience the most wear and tear, and timely intervention can prevent breakage.