
 Ethan Cole

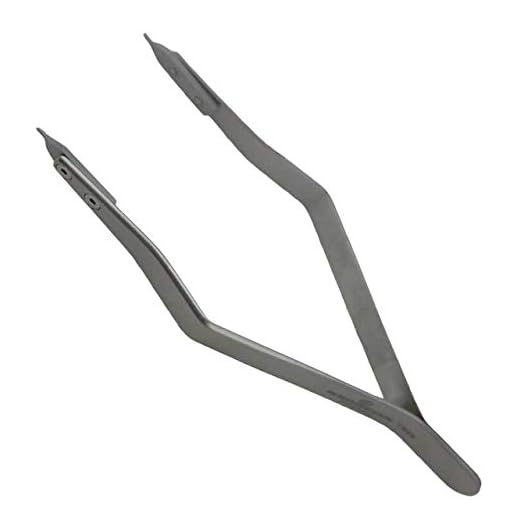
If you want to refresh the look of your timepiece, it’s simple to replace its strap. Gather a small tool, like a spring bar tool or a thin, sturdy object, to help you in this task. Begin by locating the spring bars that secure the band. Gently compress the ends of the spring bar with your tool to release it from the lugs.
Once the original strap is detached, align the new one with the lugs of your accessory. Ensure the spring bars are properly positioned and securely inserted. A little push may be required to snap them into place. After installation, give a gentle tug on the new strap to confirm it’s firmly attached.
This straightforward process allows customization and personalization of your accessory, making it an enjoyable way to express your style. Whether opting for leather, metal, or a fabric option, a new strap can significantly transform the overall appearance of your timepiece.
Changing Your Timepiece’s Strap
To detach the current strap, locate the spring bars at the junction where the strap meets the case. Using a spring bar tool, apply pressure to compress the bar and gently lift the strap away from the case. Make sure to perform this step with care to avoid scratches on the surface.

Selecting a New Strap
After removing the old strap, choose a replacement that complements your style. Consider materials–such as leather, metal, or synthetic options–along with width and color to achieve a cohesive look that matches your timepiece.
Attaching the New Strap
Align the new strap’s holes with the watch case lugs. Insert the spring bar into the lug hole and compress it carefully to slide it into place. Ensure it clicks securely to confirm proper attachment. Repeat this process for the opposite side.
Choosing the Right Replacement Band for Your Timepiece
Select a material that aligns with your lifestyle. For daily wear, consider durable options like silicone or stainless steel. If you prefer a touch of elegance for formal occasions, leather or mesh bands may be ideal.
Determine the appropriate width before purchasing. Measure the space between lugs accurately, as a mismatched size will prevent proper attachment.
Evaluate the quality of hardware. A sturdy clasp or buckle is essential for security and longevity. Opt for stainless steel or high-grade plastic to ensure reliability.
Consider style and color. The replacement should complement existing attire. Neutral tones offer versatility, while vibrant colors can express personality.
Research compatibility with your device. Some brands have proprietary fittings; verify that the chosen item aligns with your specific model’s requirements.
Read reviews and ratings to gauge user satisfaction. Insights from others can guide toward trustworthy products.
Tools Needed to Replace Your Timepiece Strap
Gather these items for a smooth replacement process:
- Spring bar tool: This specialized tool helps release the spring bars that hold the strap securely in place.
- Screwdriver set: Used for watches with screws on the lugs, ensuring you can safely detach the original accessory.
- Tweezers: These are useful for handling small components and ensuring precision during the process.
- Soft cloth: Protects the watch face and case from scratches while working on it.
- Small bowl: Keeps screws and spring bars organized to prevent loss during the swapping procedure.
Each tool enhances accuracy and minimizes damage risk, facilitating a proficient transition.
Step-by-Step Guide to Removing the Old Band
Begin by placing your timepiece face down on a soft cloth to prevent scratches. Locate the spring bar on one side of the strap.
Use a spring bar tool or a flathead screwdriver to compress the spring bar inward. While applying gentle pressure, pull the strap away from the case.
Once one end is free, repeat the process on the opposite side. Ensure both ends are released and set the old strap aside.
| Step | Action | Tip |
|---|---|---|
| 1 | Place the timepiece face down. | Use a soft cloth for protection. |
| 2 | Locate spring bar. | Inspect both sides. |
| 3 | Compress spring bar with a tool. | Apply consistent, gentle pressure. |
| 4 | Pull strap away from the case. | Work on one side at a time. |
| 5 | Set aside the old strap. | Ensure all components are intact. |
Double-check that both ends of the strap are completely detached before proceeding with the new installation.
Installing the New Watch Band Correctly
Align the new strap holes with the lugs on the casing, ensuring a snug fit. Gently slide the spring bar into the appropriate hole, applying even pressure until it clicks into place. Verify the connection by tugging lightly on each end of the strap to confirm that the bar is securely seated.
Final Adjustments
If necessary, adjust the length of the new strap for comfort. This can often be achieved by removing or adding links or utilizing specific adjustment features of the strap. Always aim for a comfortable yet secure fit on the wrist.
Inspection
Perform a thorough examination of the attached strap. Check for any misalignments or loose components. Ensure that the clasp functions properly and that the watch remains securely affixed during movement.
Tips for Maintaining Your New Strap
Regular cleaning extends the lifespan of your new attachment. Use a microfiber cloth to wipe it down, ensuring that dirt and sweat are removed without scratching the surface.
Avoid exposing your accessory to harsh chemicals or abrasive materials, as these can lead to discoloration and damage. Stick to gentle soaps and water for cleaning.
Store your piece in a cool, dry place when not in use to prevent wear and tear. Consider a dedicated box or pouch to avoid tangling or unnecessary pressure on the strap.
Adjust the fit as needed. Periodically check for any loosening or stretching, which can lead to misalignment or discomfort. Take care to tighten any screws or pins securely.
Regular Inspection
Examine your new piece for signs of wear and tear. Look for fraying, cracking, or loose connections. Address any issues immediately to prevent further damage.
Environmental Factors
Keep the strap away from extreme temperatures and humidity. Excessive moisture can lead to mold or deterioration, while heat can warp or shorten its lifespan.


