
 Ethan Cole

Gather high-quality materials like a solid case, a reliable movement, and durable straps. Choose your preferred design style–rustic, modern, or vintage–to ensure your project reflects personal taste. A clear blueprint will guide each step, from selecting components to final assembly.
Start with the casing; opt for metals or woods that complement your design. Drill precise openings for the crown and lugs, ensuring a secure fit for the mechanism. Engage in careful measurements–accuracy is key when working with intricate pieces.
For the movement, select a trusted brand to guarantee longevity and precision. DIY enthusiasts often prefer quartz movements for their ease of use, while mechanical options offer a richer crafting experience. Familiarize yourself with installation procedures to avoid common pitfalls.
Straps can be crafted from leather, fabric, or synthetic materials. Choose a width that complements the case size to maintain harmony. Consider stitching patterns or embellishments that enhance aesthetic appeal, allowing for customization that reflects individuality.

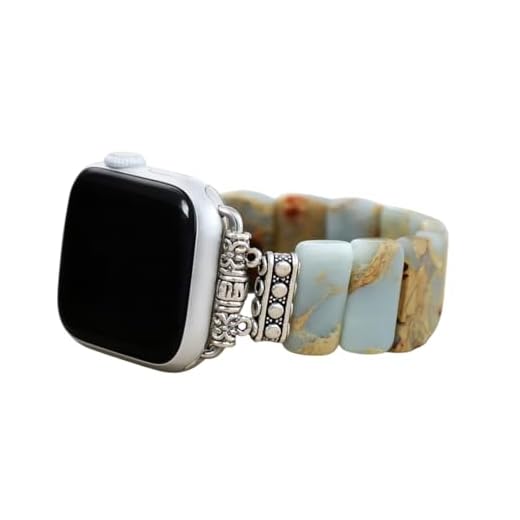
Assemble the components meticulously, ensuring everything fits perfectly. Test the timekeeping functionality before finalizing the design. This last check ensures your creation is not only visually pleasing but also practical and reliable for everyday use.
Choosing the Right Materials for Your Timepiece
Select materials based on durability, aesthetics, and comfort. The case, strap, and movement components should complement each other while serving practical functions.
Case Materials
- Stainless Steel: Resistant to rust and corrosion, ideal for long-lasting use.
- Titanium: Lightweight yet incredibly strong, offering excellent wear resistance.
- Bronze: Develops a unique patina over time, appealing for its vintage look.
- Plastic or Resin: Lightweight and colorful, suitable for sporty designs.
Strap Options
- Leather: Provides a classic look and comfort, but may require careful maintenance.
- Metal Bracelets: Durable, often adjustable, and available in various styles.
- Nylon or Fabric: Breathable and lightweight, ideal for casual or outdoor styles.
- Silicone: Flexible and waterproof, perfect for sports and active wear.
Evaluate movements manufactured from high-quality alloys or ceramics for reliable functionality. Consider the type of crystal for the face; sapphire offers scratch resistance, while mineral glass is more affordable. Selecting the right combination of materials enhances both the aesthetics and longevity of the creation.
Step-by-Step Assembly of the Timepiece Mechanism
Begin with a clean, organized workspace. This ensures that all components are easily accessible during assembly.
1. Prepare the Base Plate
Align the movement on the base plate, ensuring that the center pin is aligned with the designated hole. Secure the movement using screws as specified in the manual. This forms the foundation for the entire assembly.
2. Install the Gear Train
Identify the gears according to their size and placement in the movement diagram. Carefully attach them to their respective axles, ensuring they engage correctly without excessive friction. Secure the gears with retaining clips where applicable.
Next, add the escapement mechanism. Position it accurately so that it controls the release of energy from the mainspring efficiently. Adjust to ensure proper engagement with the gear train.
3. Add the Mainspring
Insert the mainspring into its designated barrel. Make sure it winds correctly and is aligned with the gear train. Secure the barrel lid once the spring is in position, preventing any slipping during operation.
4. Fit the Hands
Carefully attach the hour, minute, and second hands to the respective pivots on the movement. Align them horizontally for optimal visibility. Use a hand press tool to secure them without bending.
5. Install the Crystal and Case
Place the crystal over the dial, ensuring it fits snugly into the case. Secure it with case screws or clips. Assemble the case back, checking for a proper seal to protect the internal components from dust and moisture.
Finally, wind the mechanism gently and conduct a functional test to verify timekeeping accuracy. Adjust as necessary for precision performance.
Creating a Custom Watch Face Design
Select a design software like Adobe Illustrator or free alternatives such as Inkscape for crafting your unique dial. Set the artboard to your desired dimensions, typically around 40mm in diameter, to match your movement. Use vector graphics for scalability and precision.
Incorporate elements that reflect your style–consider minimalistic numbers, intricate patterns, or even personal symbols. Choose a color palette that complements the overall aesthetic; contrasting colors enhance readability.
For adding hour markers, explore different styles: dots, lines, or shapes. Ensure they’re adequately spaced and align with your design theme. If using photographic images, ensure high resolution to avoid pixelation when scaling.
Text elements should be carefully chosen; use fonts that are legible at small sizes. Place the brand name or logo near the center or at 12 o’clock. Keep the text color in harmony with your background for clarity.
Create layers for each design component. This allows for easy adjustments and enhancements. Save iterations frequently to avoid loss of work.
Print on high-quality paper to visualize the final look. Before finalizing, explore how the designs interact with the casing and movement. Adjust as necessary to ensure seamless integration.
Lastly, consider applying protective coating or laminate to your design for durability, especially if exposed to wear. Reflect on the craftsmanship in every detail to achieve a personalized creation.
Techniques for Crafting the Band
Select leather or fabric for a classic look; cut strips according to desired width and length. Use a rotary cutter for clean edges. Punch holes with a leather punch for adjustability. Consider stitching with durable thread for added strength.
If opting for a metal band, measure and cut links precisely. Use pliers to assemble or disassemble links for a customized fit. For a polished finish, use sandpaper or a polishing cloth to smooth edges.
For a fabric band, weave or braid strands of nylon or cotton. Fasten ends with strong glue or stitching; ensure the clasp area is reinforced for durability.
Experiment with dye or paint on materials for personalization. Apply finishes or sealants to enhance longevity and protect against moisture.
Prepare connectors and attachments carefully, ensuring they align well with the case. Consider various styles–deployant, tang, or magnetic closures–for practicality and aesthetics.
Setting Up the Watch Movement and Battery
Begin with securing the movement within the case. Alignment of the movement with the case’s stem hole ensures proper fit. Use mounting screws to tighten the movement into the designated slots, ensuring it sits flush against the case back.
Next, install the battery. Identify the battery compartment–most movements have a removable cover. Carefully place the battery into its slot with the positive side facing up, ensuring a snug fit. Replace the cover to prevent dust accumulation and maintain functionality.
Check the movement’s operation by setting the time and observing the hands. If the mechanism does not engage, remove the battery and reinsert it to eliminate potential connection issues. Additionally, inspect for any debris that may interfere with the quit mechanism.
Once functionality is confirmed, seal the case. Ensure gaskets are aligned properly to maintain water resistance. Engage the case back with a wrench, applying even pressure to avoid stress on the delicate movement.
Finally, test the watch after assembly by observing its performance over a few hours. Regular monitoring will help you detect any irregularities early, allowing for adjustments or repairs if needed.
Finishing Touches and Personalization Options
Integrate unique elements to enhance both aesthetics and functionality. Consider engraving a personal message or initials on the back of the case to add a sentimental touch. Select a distinctive font style that resonates with your personal brand for the engraving.
Utilize custom color finishes on the casing, such as brushed metal or a matte coating, to reflect personal style. You can also explore different plating options; rose gold and gunmetal are trending alternatives to traditional stainless steel.
For the face, apply a unique texture or background pattern. Materials like mother-of-pearl or textured glass can provide visual depth. Consider using luminous markers for better visibility in low-light conditions.
Experiment with various band styles and materials. Leather offers classic elegance, while silicone or nylon can cater to a sporty look. Customize the band with alternative stitching patterns or colored thread to enhance its visual appeal.
Incorporate a unique clasp mechanism that reflects your personality. Push-button clasps offer convenience, while magnetic closures provide a sleek and modern look.
Enhance functionality by including additional features, such as interchangeable straps that allow for versatility in style. Make use of different colors and textures for quick changes based on occasion.
Explore limited edition or themed designs that resonate with specific interests or hobbies. This can include patterns inspired by nature, art, or even personal milestones.



