
 Ethan Cole

For an accurate fit, begin by selecting a pair of calipers or a precise ruler. The diameter of the circular part of the timepiece, typically found on the front, is pivotal for understanding its size. Position the calipers across the widest section to ensure measurement includes the entire circumference.
Next, assess the thickness of the entire timekeeper. This is done by placing a ruler flush against the back surface and measuring to the topmost point of the glass. This dimension affects how it sits on the wrist and impacts comfort.
Don’t overlook the lug width, which indicates the space between the lugs where the strap attaches. This measurement is crucial for selecting an appropriate band or bracelet. Use the calipers to measure this distance from the inside edge of one lug to the inside edge of the opposite lug.
Finally, understand the significance of the crown position height. This element can influence the overall appearance and usability. Measure from the back casing to the highest point of the crown, ensuring that operational ease and aesthetic balance are maintained.

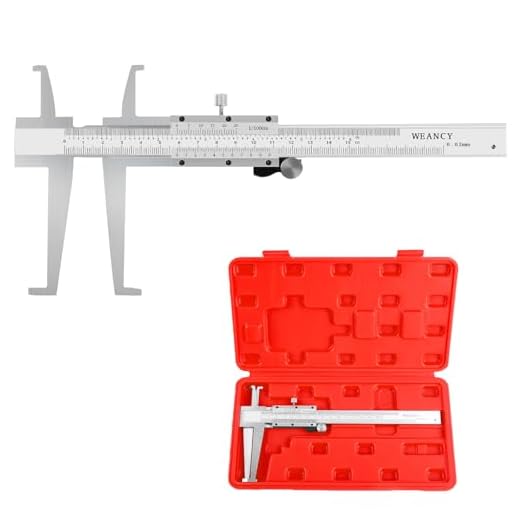
Accurate Sizing of Timepiece Housing
Use calipers for precise dimensions of the circular body. Measure the diameter from one side to the other across the widest point.
Follow these specific steps:
- Ensure the caliper is zeroed before measuring.
- Place it on a flat surface and position the timepiece securely.
- Adjust the calipers to touch both edges of the circular body comfortably.
- Read the measurement directly from the calipers.
Thickness Evaluation
To determine the thickness of the housing, follow this approach:
- Set the digital caliper to zero while it’s closed.
- Open it and place the timepiece between the jaws to capture its thickness.
- Ensure the entire piece rests flat for an accurate reading.
Additional Considerations
Note the lug-to-lug distance, where the edges of the lugs extend outward:
- Position the caliper from the outer edge of one lug to the outer edge of the opposite lug.
- This measurement is vital for strap compatibility.
Recording these dimensions provides clarity for choosing appropriate straps or cases, ensuring a perfect fit for personal style and comfort.
Selecting the Right Tools for Measurement
Employ a caliper for precise dimensions. These tools ensure accuracy when determining the diameter and thickness of components.
Types of Calipers
Opt for digital calipers for ease of reading and improved accuracy. Alternatively, a mechanical caliper provides reliable functioning without battery dependence.
Other Useful Instruments
Incorporate a flexible measuring tape for curved surfaces and a micrometer for smaller parts like lugs. A straightforward ruler can suffice for quick measurements in less detailed assessments.
Always double-check readings for consistency. Utilize a clean, flat surface to position the piece correctly and maintain alignment during the assessment.
Identifying Key Dimensions: Diameter and Thickness
To accurately assess the dimensions of a timepiece, focus on two primary metrics: diameter and thickness. These measurements play a significant role in determining the overall aesthetic and fit of the accessory.
Diameter Measurement
Diameter is measured across the face of the device from one side to the other, passing through the center. Utilize calipers for precision, ensuring you record the figure in millimeters (mm).
Thickness Measurement
Thickness is obtained by measuring from the top of the crystal to the bottom of the case back. Again, calipers are preferred for their accuracy. In this instance, ensure that the watch is not under any pressure as this can influence the reading.
| Dimension | Measurement Method | Recommended Tool |
|---|---|---|
| Diameter | Measure across the face | Calipers |
| Thickness | Measure from the crystal to the case back | Calipers |
Correctly identifying these dimensions allows for a better understanding of the timepiece’s design and how it conforms to personal style preferences.
Measuring the Lugs: Understanding Attachment Points
To determine lug measurements, focus on the distances between the lugs, commonly referred to as lug width, which is critical for strap compatibility. Precision in this dimension is vital; use a caliper or a ruler to gauge the space between the inner edges of the lugs. Record this measurement in millimeters for accurate referencing.
Additionally, assess the length of the lugs from the top to bottom. This can influence the fit on the wrist, affecting comfort and aesthetic appeal. To obtain a precise measurement, align your measuring tool vertically along the lug, ensuring it captures the entirety from one end to the other. Document this length in millimeters as well.
Importance of Lug Design
Understand that lug design also impacts overall watch aesthetics and wearability. Different styles, such as straight, curved, or integrated lugs, can affect how the timepiece conforms to the wrist. Evaluate these features alongside your measurements to select appropriate straps or bands that match the design.
Conclusion on Lug Dimensions
Accurate measurements of lugs facilitate better customization and replacement of bands or straps, leading to a satisfactory fit. Always double-check your values, as small discrepancies can affect the overall experience of wearing the timekeeping device.
Assessing the Case Shape: Round, Square, or Unique Designs
Evaluate the overall silhouette to determine the type of design. Common shapes include round, square, rectangular, and various bespoke forms. Each shape can significantly influence comfort and style.
- Round: This classic form typically offers balanced proportions and a universal appeal. Common diameters range from 36mm to 44mm. Measure from one edge of the circle to the opposite side.
- Square: Characterized by equal sides. Ensure to capture the measurements accurately across the width and height, measuring diagonally for additional insight. Sizes can vary, but a typical range is 30mm to 42mm.
- Rectangular: Similar to square but elongated. Measurements require attention to both length and width, usually falling between 25mm x 38mm and 30mm x 50mm.
- Unique Designs: These might involve asymmetrical or unconventional shapes. For these variations, precise measurements are even more critical. Take dimensions from the widest and tallest points.
Aside from shape, consider how the design complements the user’s functionality needs and aesthetic preferences. Reflect on how the geometry aligns with personal style while ensuring a comfortable fit on the wrist.
Taking Note of the Crown and Pushers: Functionality Impact
Consider the crown and any pushers when assessing dimensions. These components significantly influence usability and aesthetic appeal. The crown, typically located at the 3 o’clock position, serves as both a winding mechanism and a time-setting tool, while pushers facilitate additional functions like chronographs or alarms.
Dimension Considerations
When measuring, account for the crown’s protrusion from the main body. This height adjustment can affect overall comfort on the wrist. Use calipers to gauge the crown’s diameter accurately, ensuring that it complements the total size profile of the timepiece.
Functional Aspects
Evaluate the number and placement of pushers. Each pusher typically corresponds to a specific function, often found on chronograph models. Their location should allow for easy access without obstructing wrist movement. Consider also the actuation force; a well-designed pusher should provide tactile feedback during use.
Documenting Measurements Accurately for Future Reference
Record all dimensions with precision. Use a notepad or digital document to maintain clarity. Structure entries by indicating the specific part being measured alongside its corresponding value. For example: “Diameter: 40mm, Thickness: 10mm.” This organized approach helps in easy retrieval and comparison later.
Photo Documentation
Capture high-quality images of each measurement process. Include close-ups of the tools used, along with snapshots of the timepiece itself. Visual aids can clarify uncertainties and serve as visual reference points for subsequent evaluations.
Consistent Units
Always utilize the same unit of measurement for consistency. If you start with millimeters, maintain that until all details are recorded. Converting to different units later can lead to errors, which may compromise accuracy. Double-check all entries for completeness and correctness after documenting.


