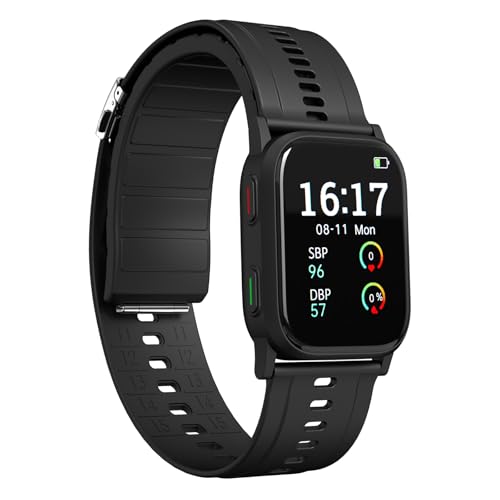
Ethan Cole

For a seamless transition in your accessorizing, ensure you have the proper tools: a spring bar tool or a small screwdriver, depending on your timepiece’s design. Identify the mechanism holding the strap in place, which is typically located at the lugs. Carefully insert the tool into the slot of the spring bar to release pressure, allowing you to detach the band without damaging the casing.
After disengaging one side, shift your focus to the opposite end. Maintain a steady grip on the strap as you repeat the process, ensuring that both ends are free from connection points. Once fully detached, inspect the integrity of the connectors for future use or replacement.
Remember to store the removed accessory in a safe location where it won’t be susceptible to scratches or loss. If you plan to switch out bands frequently, consider investing in a quick-release system for enhanced convenience, as this allows for effortless exchanges without the need for specialized tools.
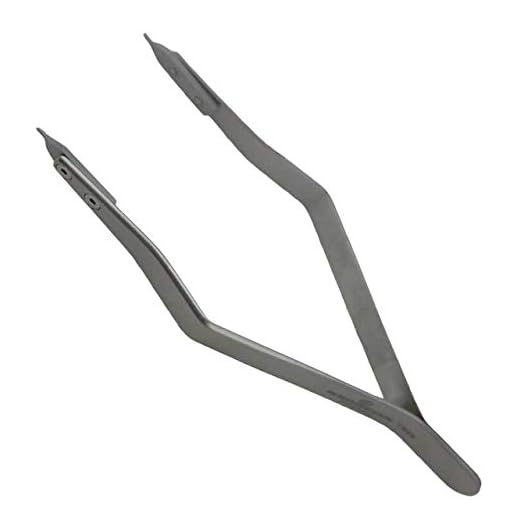

Steps for Detaching a Band from a Timepiece
Locate the spring bar mechanism on both ends of the piece. Most straps are secured using these bars. Using a spring bar tool, gently compress the ends of the bar to disengage it from the lugs.
Ensure you place a soft cloth beneath the timepiece to avoid scratches during this process. Once the bar is compressed, carefully pull the strap away from the lugs. Repeat this on the opposite side to completely detach the strap.
If your accessory features a pin-and-tuck or leather loop, identify the closure’s position. Slide the pin out of the hole and carefully unthread the leather or fabric. Take precautions to avoid damaging any delicate materials.
For models equipped with a quick-release feature, simply pull the lever on each side of the strap outward to unlock it. The band should fall away with gentle effort.
| Method | Tools Required | Difficulty Level |
|---|---|---|
| Spring Bar Removal | Spring Bar Tool | Intermediate |
| Pin and Tuck | None | Easy |
| Quick-Release | None | Very Easy |
After detachment, inspect the connectors for wear or damage before attaching a new strap. Proper maintenance ensures longevity and functionality of the timepiece.
Identifying the Type of Strap
Begin by examining the attachment mechanism. Common types include pins, screw bars, and quick-release levers. Each of these mechanisms determines how to detach the strap efficiently.
Leather and Fabric Types
Check the material; leather options typically have a softer feel and a more structured form, while fabric straps present a more flexible character. For fabric models, look for Velcro or fabric loops for easy adjustments.
Metal Variants
For metal options, inspect the links. Many have a folding clasp or split pin mechanism. This provides insight into whether you’ll need tools like a small screwdriver or a link removal tool. Identify if the design has removable links to facilitate changes without complications.
Determining the Necessary Tools for Removal
Begin with a variety of tools based on the type of attachment. A spring bar tool is commonly required for interchangeable styles, while some fixed installations may require a simple pin or screwdriver.
For spring bar mechanisms:
- Spring bar tool – helps in compressing the spring bars.
- Small flathead screwdriver – useful for prying up stubborn links or attachments.
In case of pins:
- Pin pusher – assists in removing pins securely without causing damage.
- Hammer – for gently tapping the pin pusher if resistance is encountered.
For leather or fabric types:
- Scissors – may be necessary for cutting if the strap is worn and unable to unclip.
- Seam ripper – helpful for those with stitching holding the strap together.
Evaluate the specific attachment method used for your timepiece to ensure you gather the correct tools before proceeding with the detachment process.
Step-by-Step Process for Metal Band Removal
Select a surface that is clean and well-lit to avoid any misplacement of components during the process.
Use a spring bar tool or a small flathead screwdriver to compress the spring bars. Locate the small holes on the inner side of the links, which house the spring bars.
Gently press or pry the spring bar inward while simultaneously pulling the link away from the case. A firm yet careful motion will ensure the spring bar disengages without damage.
Repeat the process for the opposite side so that the entire assembly detaches seamlessly.
For models with removable links, identify the location of the pin that secures each link. Utilize the proper tool to push or pull out the pin as needed.
After successfully disassembling the components, store them securely to prevent any loss or damage, especially if reassembly is planned.
To reattach or adjust the metal structure later, reverse the steps ensuring that all connectors are securely fastened and fit snugly into place.
Step-by-Step Process for Leather and Fabric Band Removal
To detach a leather or fabric strap, first, inspect the attachment points for any visible pins or fasteners. Locate the spring bars or screws that hold the strap in place. A spring bar tool, with a forked end, is essential for this task.
1. Prepare the Tool
Grip the spring bar tool firmly, ensuring the forked end is clean and free of any debris. This will facilitate a smooth and damage-free detachment.
2. Release the Strap
Position the forked end of the tool against the spring bar. Gently press inward to compress the bar. While applying pressure, carefully lift the strap away from the casing. Repeat this on the opposite side if applicable. For straps secured with screws, use a small screwdriver to loosen them before fully removing the attachment.
After the strap is separated, inspect the pieces for any wear. Clean the attachment points before considering a replacement. Store the strap in a safe, dry place to maintain its condition until future use.
Proper Techniques for Reattaching the Watch Band
Align the attachment points of the strap with the lugs of the case. For a secure fit, ensure that the spring bars are properly seated in the lugs.
Utilize appropriate tools, such as a spring bar tool, to gently compress the spring bar while inserting it into the lug hole. Ensure the bar clicks into place, signifying a proper connection.
For metal straps, check that the links are correctly oriented and aligned before fastening. Utilize a gentle force to avoid damaging the locking mechanism.
If working with leather or fabric, slide the end of the strap through the keeper loop and pull snugly. Ensure that the clasp or buckle secures firmly without excessive force.
After reattachment, inspect for any movement or looseness by gently tugging on the strap. A secure attachment will feel firm without any play.
Perform a final check before wearing, ensuring all components function correctly. This precaution helps in maintaining longevity and wearability.