
 Ethan Cole

Utilize a proper spring bar tool for efficient removal of the attachment. This specialized instrument is designed to release the spring bars, which secure the strap to the casing. Position the tool tip in the small gap between the strap and the lugs, then gently compress the spring to release the bar.
Ensure to have a soft cloth on hand to prevent scratches on the surface during the process. As you apply pressure to the tool, carefully slide the bar out while keeping a steady grip on your accessory. Repeat the same procedure for the opposite side, ensuring that both bars are released completely.
After detaching the strap, inspect the spring bars for any wear or damage. Replacing them if necessary will guarantee a secure fit for any new or existing straps. This method not only simplifies the swapping process but also maintains the integrity of your timekeeper throughout its lifespan.
Identifying the Type of Watch Strap and Its Mechanism
Begin with a careful examination of the attachment points where the closure system connects to the timepiece. Determine whether the mechanism consists of spring bars, screws, or a quick-release system.
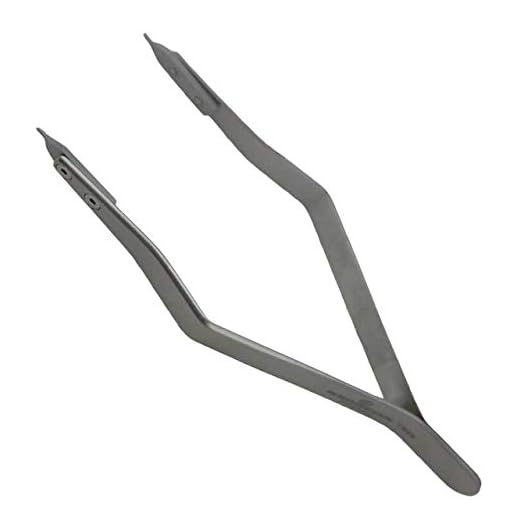

For timepieces featuring spring bars, utilize a spring bar tool to compress and remove the bar from its housing. Observe the ends of the bar, which may appear slightly recessed; this indicates a need for extra care.
If the mechanism employs screws, a precision screwdriver is necessary. Examine the position and size of screws and apply appropriate pressure without stripping them. The absence of a quick-release may involve unscrewing multiple fasteners.
Quick-release mechanisms simplify removal; often, a lever or button must be pressed to detach sections without tools. Inspect the underside of the strap for any indicators or buttons that facilitate this process.
Different materials can also influence removal techniques. Metal links may require a link removal tool, while leather and fabric may often rely solely on buckle or clasp systems. Recognize each material’s unique traits to avoid damage.
After identifying the strap type and its connecting method, preparation for removal becomes straightforward. Ensure a stable workspace, lay out tools, and approach each step with precision to maintain the integrity of both the strap and watch.
Gathering the necessary tools for band removal
Prior to initiating any changes to your timepiece’s strap, ensure you have the following tools at hand:
Spring Bar Tool
This specialized tool is designed for inserting and removing spring bars, which connect the strap to the casing. Its pointed end aids in compressing the spring bar for seamless removal.
Screwdriver Set
A selection of tiny screwdrivers, particularly Philips and flat-head, may be essential for straps secured with screws. Verify the size to prevent damaging the screws during removal.
Pliers can be useful for gripping and coordinating movements, especially on stubborn parts. Additionally, a soft cloth will protect the watch’s case from scratches.
Lastly, opt for a work surface that is clean and well-lit to avoid losing small parts and ensure precision during the process.
Step-by-step guide for removing spring bars
Utilize a spring bar tool to start. Position the pointed end against the spring bar groove.
- Apply gentle pressure towards the center of the case. This will compress the spring bar.
- Simultaneously pull the strap free from the case while maintaining pressure on the spring bar.
- Once released, carefully remove the opposite side of the spring bar from the other end of the strap.
Tips for successful removal
- Work on a soft surface to prevent scratches.
- Use a magnifying glass if necessary for better visibility.
- Keep the spring bars in a designated area to avoid loss.
Final steps
Inspect both the bars and strap for wear. Replace any damaged components to ensure longevity.
Techniques for Detaching Leather and Fabric Straps
For leather and fabric straps, examining the attachment points is key. Identify whether the strap uses spring bars, quick-release pins, or other mechanisms. If using spring bars, apply gentle pressure to compress each end using a spring bar tool, allowing the bar to slide out of the lug holes. Utilize a soft cloth to avoid damaging the leather or fabric while performing this step.
With quick-release pins, locate the lever on the side of the strap. Press the lever inward, then gently pull the strap away from the case. This method ensures minimal wear and tear on materials, preserving their integrity. Be cautious with fabric straps to prevent fraying; steady hands help maintain shape during removal.
Consider using a flathead screwdriver for stubborn attachments. Carefully insert the tip between the strap and the lug to provide leverage while protecting the material from damage. Once the strap detaches, verify the condition of both the strap and the watch case to spot any potential scratches or scuffs.
Always practice patience during this process. If resistance is felt, reassess the mechanism instead of forcing the removal. Each type of strap requires a tailored approach to ensure safe and damage-free detachment.
Reattaching or Replacing the Watch Band After Removal
Align the lugs with the spring bars when reattaching a new strap or reinstating the existing one. Ensure that each bar fits securely into the designated hole, providing stability and preventing accidental detachment during wear.
Using Spring Bar Tools
Employ a spring bar tool to compress the ends of the spring bars. This technique facilitates their insertion into the lugs. Apply gentle pressure until the bar clicks into place, confirming that it is seated properly.
For Leather and Fabric Straps
Incorporate proper threading techniques for leather and fabric options. Insert the strap through the buckle or loop, ensuring it sits flat against the watch case. Adjust to achieve a comfortable fit, making certain there are no twists or overlaps.
After securing the new or reinstated strap, check for alignment and movement. A well-fitted strap enhances comfort and maintains aesthetics, ensuring the timepiece remains functional and stylish.


