
 Ethan Cole

For accurate adjustments on your timekeeping device, invest in a quality spring bar tool. This instrument simplifies the process of removing or attaching straps, ensuring you can change styles or make repairs with ease. Choose a model with dual-ended tips for versatility and effectiveness in dealing with various strap types.
When it’s time to adjust the movement, a case back opener is indispensable. Opt for the type that fits your specific casing style, whether it be a screw-down or snap-off variant. Apply even pressure to prevent damage, ensuring a clean separation of the case back from the body.
Utilizing a magnifying loupe can enhance your ability to work on intricate components. This tool reveals details that may be difficult to see with the naked eye, aiding in meticulous installation or repair tasks. Pair it with precision tweezers for handling delicate parts, reducing the risk of accidental damage.
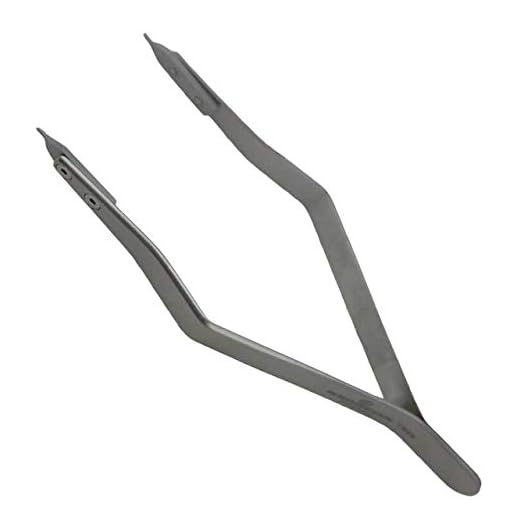

For battery replacements, a simple battery opener will suffice. Make sure to have a designated workspace that is well-lit and free from distractions. This environment will enable you to focus and prevent any small components from being lost.
Setting Up Your Workspace for Watch Maintenance
Choose a clean, well-lit area to work on timepieces. Adequate light prevents strain and enhances visibility for intricate tasks.
Utilize a large, flat surface, preferably covered with a soft cloth to avoid scratches on surfaces and components. Ensure that the workspace is free from dust and debris which could interfere with delicate mechanisms.
Incorporate a magnifying glass or jeweler’s loupe for inspecting small parts. This allows for detailed examination of intricate elements without eye strain.
Organize your components with small trays or containers to avoid mix-ups. Label these containers to ensure easy identification of screws, gears, and other parts. Color-coded trays can expedite the sorting process.
Equip yourself with necessary lighting, like a lamp with adjustable brightness. This will help highlight tiny details and ensure accurate repairs.
Keep a set of basic cleaning supplies handy, including brushes, cloths, and non-abrasive solvents. Maintaining cleanliness is critical for preserving functionality.
Establish a designated area for storing spare parts and additional components. This prevents clutter and facilitates quick access during maintenance tasks.
Lastly, maintain good posture while working. Use a comfortable chair and position materials at a height that minimizes strain on your back and wrists.
Choosing the Right Tools for Watch Repair
Select precision screwdrivers with interchangeable heads to accommodate different screw sizes on various timepieces. This versatility minimizes the risk of stripping screws and enhances repair efficiency.
A magnifying loupe should be included to improve visibility of intricate components. This is vital for inspecting parts, ensuring accurate reassembly and troubleshooting.
Invest in a case opener, as watch cases can vary significantly. A tool that allows for both snap-on and screw-back cases is ideal, as it accommodates a wider range of designs.
A spring bar tool is necessary for strap changes and adjustments. Choose one with a double-ended design, facilitating easy removal and installation of spring bars without scratching the case.
Additionally, a movement holder secures the mechanism during repairs. Opt for a model with rubber pads to prevent slipping and damage to delicate parts.
Silicone grease is recommended for water-resistant models, ensuring gaskets maintain their integrity. Select a non-corrosive variety to avoid damaging components.
Lastly, a cleaning kit with microfiber cloths, cleaning solution, and brushes aids in maintaining the aesthetic of the timepiece. Regular upkeep prevents dirt accumulation and prolongs the lifespan of the device.
Adjusting Band Links with Precision Instruments
Begin with the correct pin pusher for link adjustments. Align the tool with the desired link pin and apply gentle pressure until the pin starts to move. Ensure a firm grip on the timepiece to prevent any slips.
Removing Links
Once you’ve located the link to remove, use the pusher to fully extract the pin. Store the pin in a safe place for potential future use. For bands with screws, a specialized screwdriver is necessary. Turn counterclockwise to loosen and remove the screw.
Reattaching Links
To attach links, position the link correctly and carefully slide the pin back through the holes. Tap gently to ensure it is secure. In cases with screws, insert the screw and tighten it clockwise until snug, taking care not to over-tighten and damage the material.
Double-check the adjustment by putting the accessory on and evaluating its fit. Make minor tweaks as needed for optimal comfort.
Replacing Batteries: Tools and Techniques
Gather the following items: a case opener, battery replacement tool, tweezers, and a microfiber cloth. Ensure all components are clean and free from dust.
Step-by-Step Process
1. Open the case: Use the case opener to gently pry off the back cover. Apply minimal pressure, avoiding scratches.
2. Remove the old battery: Carefully lift the old battery with tweezers. Note its orientation for the new one. Use the battery replacement tool for assistance if required.
3. Insert the new battery: Position the new cell in the same orientation as the old one. Ensure it fits snugly into the compartment.
4. Reattach the back cover: Align the cover and use the case opener to push it back into place securely. Confirm it sits evenly around the edges.
Helpful Tips
Avoid touching the new battery with bare fingers to prevent dirt and oils from affecting its performance. Always check the battery’s expiration date before installation.
| Tool | Purpose |
|---|---|
| Case Opener | Opens the casing without damage |
| Battery Replacement Tool | Supports removal and installation of batteries |
| Tweezers | Handles small components safely |
| Microfiber Cloth | Cleans surfaces to prevent contamination |
Cleaning and Maintaining Components with Proper Tools
Regular care of components is paramount for longevity and performance. Utilize the following recommendations:
- Soft Brushes: Use a soft-bristle brush to dislodge dust and debris from crevices without causing scratches.
- Microfiber Cloth: Wipe surfaces with a gentle microfiber cloth to remove fingerprints and smudges effectively.
- Lubricants: Employ appropriate lubricants for moving parts. A synthetic oil designed for timepieces minimizes friction, improving accuracy.
For daily maintenance:
- Remove the case back when possible, ensuring proper sealing is maintained post-cleaning.
- Use a vacuum cleaner with a suitable attachment to eliminate loose particles.
- Check for moisture or corrosion, particularly in battery compartments and gaskets.
Deep cleaning requires precision:
- Ultrasonic Cleaner: For intricate components, an ultrasonic cleaner gently removes grime without physical contact.
- Cleaning Solution: Use a specialized cleaning solution mixed with water to soak non-sensitive parts, followed by thorough rinsing.
Conclude with a reassembly procedure:
- Ensure all cleaned components are completely dry before reassembly.
- Check for proper alignment and fit during reinstallation.
- Test functionality to confirm proper operation.
Consistent cleaning and adequate maintenance extend the operational life of your pieces while ensuring their precision and attractiveness.
Troubleshooting Common Timepiece Issues with Specialized Instruments
For timepieces that exhibit issues like inaccurate timekeeping, begin by employing a precision watchmaker’s screwdriver. This allows access to the back case, where you can examine the movement for signs of misalignment or debris. Adjust screws gently to correct any raised components that may disrupt functionality.
Addressing Water Resistance Problems
For ensuring proper water resistance, utilize a case back press. After inspecting the gasket for wear, replace it if necessary. Use the press to secure the case back tightly, preventing moisture ingress during usage. Test the seal with a pressure tester to confirm effectiveness.
Fixing Scratched Surfaces
To address scratches on the crystal, opt for a polishing compound designed for synthetic materials. Apply it with a microfiber cloth in circular motions to minimize the scratch’s visibility. For deeper scratches, consider a professional-grade polish or gemstone paste to restore clarity.


