Ethan Cole

To set the time accurately on your timepiece, begin by locating the crown, which is typically situated on the side of the casing. Pull the crown out gently to its second click position; this will allow you to modify the time settings directly. Ensure that you rotate the crown clockwise or counterclockwise until the hour and minute hands reflect your desired time.
Once the correct time displays, push the crown back to its initial position. For watches featuring a date function, execute this adjustment while ensuring the hour hand is positioned away from midnight to prevent any potential damage to the date mechanism.
Periodically check the accuracy of your timepiece, especially if it experiences drastic environmental changes, as these factors can influence its precision. Regular use of a timekeeping app can serve as a reliable reference point for your adjustments.
Adjustment Instructions for Your Timepiece
Utilize the crown or the buttons on the side to set the current time and date on your device. Pull the crown out gently to the first click to modify the date. For time settings, pull it out completely to the second position. Rotate the crown clockwise or counterclockwise until correct time appears.
If your wrist accessory features a metal band, resizing it requires removing links. Use a link removal tool to push out the pins connecting the links, or visit a jeweler for professional assistance.

For rubber or leather straps, trimming or adding holes can help secure a better fit. Ensure it is comfortable yet snug for daily wear.
- Check for time zone settings; adjust accordingly if necessary.
- Always press the crown back in fully after making changes to maintain water resistance.
Some models may have additional features such as alarms or a timer. Refer to the specific model manual for detailed guidance on utilizing these functions.
Identifying Your Casio Watch Model
Locate the model number on the back of your timepiece. It usually consists of a combination of letters and numbers, such as “F91W-1” or “AQ-S810W.” This information is crucial for accessing specific instructions relevant to your timepiece.
Consult the manufacturer’s website or user manual. Casio provides detailed resources for each model. Inputting the model number in the search bar will yield precise guides and specifications.
Use the unique design elements of your timepiece to narrow down the options. Features such as analog or digital displays, specific button placements, and color schemes often differ between collections.
Join online forums or communities. Enthusiasts frequently share insights on identifying models and might assist with any queries regarding your piece.
Many models feature a specific series logo. For instance, G-SHOCK or Edifice prominently displayed indicates a particular category, which simplifies recognition and further exploration.
Understanding the Time Adjustment Function
Access settings for accurate time manipulation using the multi-function button, which usually features the word “Mode”. Press until the display shows the time setting feature. Once in this mode, use the adjacent buttons labeled “+” and “-” to refine hours and minutes.
Steps for Effective Time Change
1. Identify the position of “Mode” button and press it to enter time change mode.
2. Utilize the “+” or “-” buttons to adjust hours and minutes. Holding these buttons may expedite the adjustment.
3. Confirm changes by pressing the “Mode” button again to exit time setting.
Table of Common Functions
| Function | Button Used | Action |
|---|---|---|
| Enter Time Setting | Mode | Press until time display appears |
| Increase Hour/Minute | + | Press to advance |
| Decrease Hour/Minute | – | Press to lower |
| Confirm Changes | Mode | Press to save and exit |
Adjustments to seconds can also be made if the model supports it; follow similar steps for precision. Always ensure to check for time zone settings if applicable.
Setting the Correct Time on Your Casio
Begin by locating the mode button on the timepiece, usually positioned on the side. Press it until the watch enters time-setting mode, which is often indicated by a flashing seconds display.
Adjusting Hours and Minutes
Utilize the buttons designated for up and down adjustments to change the hour and minute settings. Ensure that you are observing AM and PM indicators if the model includes them, as this will help maintain accurate time.
Finalizing Settings
Once the desired time is set, press the mode button to confirm and exit the time-setting mode. This action will typically stop the seconds from flashing, indicating that the changes have been saved. If there are additional settings like date or alarm, follow a similar procedure to customize your preferences.
Adjusting the Date and Day Display
To change the date and day, pull out the crown of your timepiece to the first or second position, depending on the model. Rotate the crown clockwise or counterclockwise to set the date. If your model features a dedicated day function, turn the crown to the appropriate direction until you reach the desired day.
Tips for Accurate Setting
Ensure the timepiece is not set between 8 PM and 4 AM when performing changes. This timeframe can interfere with the date change mechanism. It’s advisable to differentiate between AM and PM; running the hour hand around the clock can help verify the correct setting.
Finalizing Changes
Once the desired date and day are selected, push the crown back in to its original position to resume standard timekeeping. Double-check the adjustments for accuracy following this step.
Setting Up Multiple Time Zones
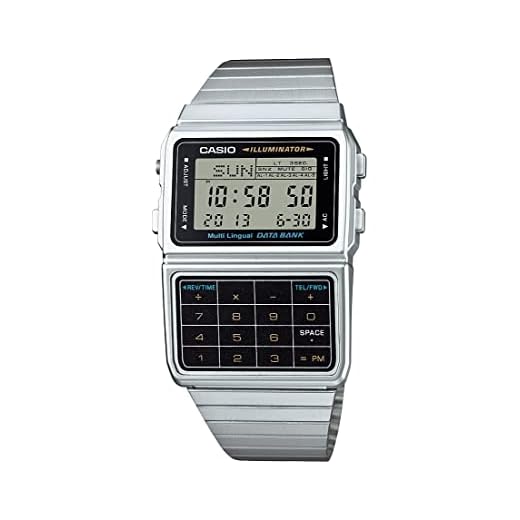
To configure multiple time zones, locate the Mode button on the side of the timepiece. Press and hold it until the display changes, showing different functions. Navigate using the Adjust button until you reach the time zone settings.
Next, select the primary time zone you wish to modify by pressing Adjust again. Use the Forward and Backward buttons to cycle through various time zones. Pay attention to the hour offset indicated on the display.
Once the desired time zone appears, confirm the selection by pressing Mode. This action tends to finalize the setting. Check for any daylight saving adjustments, especially if applicable in that region, to ensure accuracy.
Repeat the navigation process for any additional time zones you wish to set. Some models allow multiple zones to be stored, providing convenience for frequent travelers or those coordinating with international contacts.
Finally, verify each time zone by reviewing the time display on the main screen. Cycle through them using the Mode button to ensure correct settings. This functionality enhances coordination across different locations.
Maintaining Your Casio Timepiece After Adjustment
Regular maintenance enhances longevity and performance. Follow these steps to keep your timepiece in top condition.
Routine Cleaning
- Use a soft, lint-free cloth to wipe off dust and fingerprints.
- For metal bands, a little warm soapy water can remove dirt. Rinse well and dry with a cloth.
Battery Replacement
- Monitor for signs of low battery, such as erratic timekeeping.
- Replace the battery every 1-3 years, depending on the model.
- Consider visiting a professional for battery replacement to avoid damage.
Water Resistance Testing
- Check the water resistance rating in your model specifications.
- Test water resistance annually, especially after battery changes or new gaskets.
- Avoid exposing your timepiece to extreme temperatures or sudden changes in pressure.
Storage Tips
-
<li Store in a cool, dry place away from direct sunlight.
- Use a watch box or pouch to prevent scratches and damage.
Following these practices ensures reliable performance and extends the lifespan of your beloved accessory. Regular checks and care will help maintain both aesthetics and functionality.
FAQ:
How can I change the time on my Casio wrist watch?
To change the time on your Casio wrist watch, locate the ‘Adjust’ button, usually found on the side of the watch. Press this button until you see the time display start to blink. Then, use the ‘Mode’ button to switch between options such as hours, minutes, and seconds. Once the desired field is blinking, use the ‘Forward’ or ‘Backward’ buttons to set the correct time. After adjusting the time, press the ‘Adjust’ button again to save your settings. Make sure to check whether your watch is in 12-hour or 24-hour mode to avoid any confusion.
What should I do if my Casio wrist watch is not keeping accurate time?
If your Casio wrist watch is not keeping accurate time, there could be a few reasons behind this issue. First, check whether the battery needs to be replaced; a weak battery can cause timekeeping problems. If the battery is fine, ensure that the watch is not exposed to strong magnetic fields, as this can affect its accuracy. If you have a non-digital model, make sure it is properly wound. If issues persist, consider consulting the user manual for troubleshooting tips or take the watch to a professional for further inspection.