Ethan Cole

Begin with a circle to represent the main body of the timepiece. Use a compass or trace around a round object to achieve a smooth edge. This will form the foundation of your design, ensuring accuracy in shape.
Next, establish the center by marking a small dot in the middle of the circle. From this point, draw the hour and minute markers evenly spaced along the outer edge. Small lines or dots can serve as indicators for each hour, while slightly longer lines can denote the 12, 3, 6, and 9 positions.


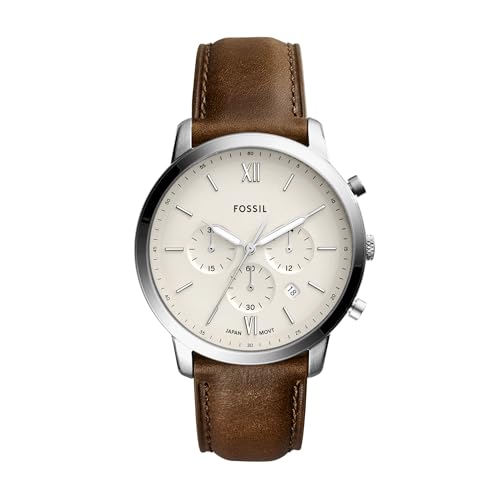
Transition to the hands by sketching two thin rectangles that originate from the center dot. One hand should be shorter for the hour, while the longer one indicates the minutes. Ensure they are proportionate and aligned towards the markers. To finish, add any embellishments like a brand name or decorative elements inside the circle, enhancing the overall aesthetic of the piece.
Creating a Basic Timepiece Illustration
Begin with a circular shape for the main body of the timepiece. Use a compass or trace around a round object to ensure a perfect circle. This will serve as the face of your creation.
Adding Details
Insert smaller circles at equal intervals around the perimeter for hour marks. These can be dots or numbers to indicate the hours. Include a larger circle near the center for the main dial, which will host the hour, minute, and second hands.
For the hands, use straight lines with varying lengths. The longest should represent seconds, the medium for minutes, and the shortest for hours. Make sure to position them at different angles to signify the time accurately.
Finishing Touches
Add a strap by sketching two elongated rectangles on opposite sides of the circle. Connect these to the body with small loops or attachments. Enhance your illustration by incorporating texture to the strap or shading the face for depth. This adds dimension and brings your design to life.
Gather Necessary Drawing Materials
Select high-quality pencils ranging from HB to 6B for a versatile range of shading. A fine-tip black pen or ink liner, like a micron pen, will help outline details clearly.
A smooth sketchbook or drawing paper, preferably at least 120gsm, allows for clean lines and prevents smudging. Additionally, kneaded erasers are useful for correcting mistakes and smudging light pencil marks without damaging the paper.
Consider using a ruler for precision in creating straight edges and measuring components of the timepiece accurately. An oval template can aid in forming the circular shape of the dial.
Colored pencils or markers will add depth and vibrancy to your piece, allowing for a realistic representation of materials. A blending stump can help create smooth transitions in shading.
Lastly, having a sharpener nearby ensures your tools are always ready, and a reference image of a timekeeper can provide guidance on proportions and design elements.
Create the Watch Face Outline
Begin with a compass to create a perfect circle, representing the base of the timepiece. Adjust the compass to your chosen radius, typically around 3 to 4 inches for a standard model. Place the point of the compass on your drawing surface, then rotate it 360 degrees to outline a clean, even circle.
After establishing the circular outline, add another circle inside to indicate the dial area. This inner circle should be slightly smaller, leaving enough space for hour markers and hands. A 1-inch gap creates a pleasing ratio.
Next, decide on the style of the ticks or marks that will represent the hours. Lightly sketch short lines around the perimeter of the outer circle to indicate these positions. Use a ruler for precision, ensuring they are evenly spaced at 30-degree intervals.
Focus on details such as the central point for the axis of the hands. Draw a small circle in the middle of the two concentric circles to represent the pivot. This will be crucial for the later addition of the hour and minute hands.
Finally, consider adding unique elements such as a logo or brand name above the central pivot area. Keep it minimalistic to maintain a clean look while allowing for personalization. Ensure the placement is balanced within the overall design.
Draw the Watch Hands
Begin by sketching the hour hand. Make it short and thick, ensuring it extends just past the center of the clock face. Consider the proportion to your circle; a length of about one-third of the radius works well.
Next, craft the minute hand. Create a longer and slimmer line than the hour hand. This should reach two-thirds of the radius for a balanced appearance. Incorporate a slight taper toward the tip to enhance the sleekness.
For the second hand, utilize an even thinner line. This hand should be drawn as a long needle, extending nearly to the edge of the watch face. A small circular design at its tip can serve as a visual anchor.
Add detail by using markers or shading techniques. For metallic effects, use gradients to simulate light reflection on the hands. Ensure the colors contrast well with the background, maintaining clarity in visibility.
Finish by depicting the pivot point where the hands meet. A small dot or circle at the center will signify the axis, adding realism to your timepiece.
Add Hour Markers and Numbers
Position twelve evenly spaced hour markers around the circle, starting from the top center location. Use small lines or dots to indicate each hour. For a refined look, make markers larger for 12, 3, 6, and 9, while keeping others smaller.
Incorporate Numerals
Place corresponding numbers next to each hour marker, ensuring they align with the markers. Use a simple font to maintain clarity. Opt for a contrasting color to enhance visibility against the background.
Enhance with Additional Details
Consider adding minute markers between each hour for better precision. These can be smaller dots or lines. Make sure these details remain subtle to avoid cluttering the design.
Design the Watch Band
Choose the style of the band that complements your timepiece. Common options include leather, metal, fabric, and silicone. Each material offers a unique aesthetic and feel.
For a leather strap:
- Sketch two parallel lines extending from each side of the case to represent the band width.
- Add stitching detail along the edges for added realism.
- Consider incorporating textures or patterns to enhance the design.
For a metal bracelet:
- Illustrate interlocking links, paying attention to the connection points.
- Use curved lines to suggest the rounded edges of each link.
- Add highlights to imply a shiny finish.
If opting for fabric:
- Draw a flat band, adding folds to indicate softness and flexibility.
- Incorporate patterns or colors to reflect the chosen fabric design.
For a silicone option:
- Create a smooth, continuous line that curves around the wrist.
- Add small grooves or dots for texture.
Finalize the design by ensuring the band connects seamlessly to the case. The overall look should harmonize with the watch face and hands for a cohesive appearance.
Finalize the Drawing with Details and Shading
Incorporate intricate elements to enhance the overall aesthetic. Begin by adding textures to the band and face, utilizing cross-hatching techniques for depth. For metallic surfaces, ensure to sketch light reflections, indicating a shiny finish. Consider the light source; shadows falling on one side of the face will create contrast, making features more pronounced.
Use a softer pencil for shading, gradually building layers to achieve a smooth gradient effect. Pay special attention to the interior of the clock face, highlighting the numbers and markers with a slightly darker tone to ensure readability.
To maximize realism, introduce subtle imperfections; no object is perfect. A slight smudge or irregularity can indicate wear, adding character. Use a blending stump to soften edges, especially around the hands and hour markers, providing a polished finish.
Finally, review the entire piece for balance. Adjust any areas that may need more definition or contrast. This meticulous refinement will culminate in a polished representation of the timepiece, showcasing your skill and attention to detail.
| Detailing Technique | Description |
|---|---|
| Cross-Hatching | Layering lines in different directions to create texture. |
| Gradient Shading | Building up shades gradually for smooth transitions. |
| Reflective Highlights | Indicating shiny areas with lighter pencil strokes. |
| Blending | Soften edges and transitions using a blending stump. |
| Character Imperfections | Adding subtle flaws for realism and uniqueness. |
FAQ:
What materials do I need to draw a simple wrist watch?
To draw a simple wrist watch, you will need a few basic materials. Start with a good quality sketchbook or some drawing paper. Pencils are essential for sketching; a range of HB to 2B pencils will work well. An eraser is important for correcting any mistakes. You can also use a ruler for straight lines, especially when drawing the watch strap or the face. Optional materials include fine liners or ink pens for outlining and colored pencils or markers if you want to add color to your drawing.
Can you explain the process of drawing the watch step by step?
Sure! Begin by sketching a circle for the watch face, ensuring it’s proportionate. Inside the circle, add another smaller circle to represent the inner part of the watch. For the watch hands, draw a straight line from the center for the hour hand and a longer line for the minute hand. Next, depict the numbers or markers around the edge of the watch face, positioning them evenly. Once you have the basic structure, outline your sketch with a fine liner for a cleaner look. After that, focus on drawing the watch strap by sketching two parallel lines that extend from either side of the watch face. You can finish by adding details like the watch crown, textures on the strap, and any brand logos. Finally, erase any unnecessary pencil marks to complete your drawing. Take your time, and don’t hesitate to refer to a picture of a wrist watch for inspiration.