
 Ethan Cole

To achieve an optimal fit, it’s advisable to utilize a proper tool such as a spring bar tool. This device allows for easy removal or addition of links, ensuring comfort while wearing the accessory.
Begin by laying the bracelet flat on a clean surface. Identify the links that require adjustment and locate the small pins on the inner side of the links. Using the spring bar tool, gently push the pin out, taking care to avoid scratching the surface of the band.
If you’re increasing the length, reconnect the links by inserting the pin through the desired link configuration. For shortening, remove the necessary links and secure the remaining sections. Ensure that the pins are fully inserted to prevent any accidental dislodging during wear.
After completing the adjustment, try on the timepiece to confirm the fit. A well-fitted band should allow for slight movement but not be overly loose. This meticulous approach not only enhances comfort but also prolongs the longevity of your cherished accessory.
Modifying Link Size for a Comfortable Fit
Begin by identifying the type of closure and links present. For metal closures, locate the small pins or screws securing the links. Use a pin pusher or small screwdriver for removal; ensure the correct tool to prevent damage.
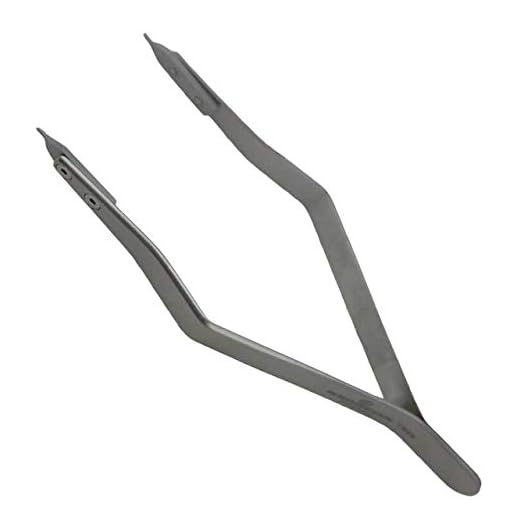

Count the number of links required for a snug fit. Typically, removing two to three links provides a standard adjustment. Use a cloth to cushion the watch while working, protecting the surface from scratches.
Next, gently pry open the clasp to access the links. For those with removable pins, carefully push the pin out from underneath, using a gentle yet steady force. For screw-type link connections, unscrew the fastenings and remove the desired links.
Reassemble the watch by reconnecting the remaining links using the same method in reverse. Double-check that the pins are securely fastened and that no gaps or looseness remain.
If there are multiple rows of links, consider adjusting each side equally for uniformity. Measure the fit on your wrist periodically throughout to ensure comfort.
Final inspection should include a thorough check of the clasp mechanism, ensuring it operates smoothly and locks securely. Any misalignment can lead to an undesired experience.
| Link Removal Tool | Usage |
|---|---|
| Pin Pusher | Helps in ejecting the link pins |
| Screwdriver | Used for unscrewing links with screws |
| Cloth | Protects the surface during adjustments |
Tools Required for Bracelet Adjustment
To modify your timepiece’s link band, gather the following instruments:
1. Pin Pusher Tool
A dedicated pin pusher helps safely remove and insert spring bars or pins from the links. Ensure it is sturdy and precise for best results.
2. Small Hammer
A lightweight hammer assists in driving out stubborn pins without causing damage. Opt for a plastic or rubber-ended hammer to minimize impact.
3. Tweezers
Precision tweezers are necessary for handling tiny components, making it easier to manage spring bars or links during the adjustment process.
4. Measuring Tool
A ruler or caliper helps to ensure accurate sizing and fit. Verify that you have a clear understanding of your desired length before proceeding.
5. Cleaning Cloth
Maintain cleanliness while working. A soft cloth can prevent scratches on the surface of your accessory and ensure an uninterrupted workspace.
Having these items on hand facilitates a smooth and secure adjustment process, allowing you to enjoy your accessory comfortably.
Identifying the Type of Timepiece Band
To determine the specific variety of your timepiece band, inspect its construction and material. Common types include metal, leather, rubber, and fabric. Each type has distinct characteristics.
Metal Options
Metal bands often come in stainless steel, titanium, or gold. Check for links or solid pieces. stainless steel bands typically feature flexible links, while titanium may be lighter and sturdier. Gold options may appear more luxurious but require careful maintenance.
Leather and Fabric
Leather alternatives include genuine leather and synthetic variants. Authentic leather offers a classic look but may wear over time. Synthetic options are often more durable and water-resistant. Fabric bands, such as nylon, are lightweight and breathable, appealing for outdoor activities.
To accurately determine your band type, consider examining how it attaches to the case. Spring bars or integrated pieces can signal different models. Knowing your band type aids in selecting appropriate adjustments, replacements, or accessories.
Removing Links from a Metal Bracelet
To successfully eliminate excess links from a metal band, identify the type of links used in your piece. Most commonly, they have removable pins or screws. For pins, gently tap a small pin punch or a similar tool into the link’s pin from the side to push it out. If screws are present, use a suitable screwdriver to unscrew each fastener.
Once links are detached, ensure the remaining parts align properly. Reconnect by using the pin or screw to secure the band. Check for a tight fit; any loose connections could lead to the risk of falling off.
When taking out multiple links, it’s advisable to remove an equal number from both sides to maintain symmetry. Also, periodically check and adjust the length if needed to ensure a comfortable fit during wear.
Adding Links to Increase Bracelet Length
To effectively extend the wrist accessory, locate additional links compatible with the existing pieces. These links are typically made from the same material and match the style of the current assembly. Ensure that the connections of the new segments can seamlessly integrate with the existing ones.
Use a gentle tool designed for this purpose to open the pin or screw that holds the components together. Carefully remove the current end piece and add the new links. Reattach the end piece, ensuring it is secure. Check for a smooth movement and alignment of the parts to guarantee comfort on the wrist.
Steps for Link Addition
1. Gather additional links from the manufacturer or an authorized retailer.
2. Prepare a small workspace with adequate lighting.
3. Align the new segments with the existing chain, ensuring correct orientation.
4. Use appropriate tools to connect the links without damaging them.
Final Checks
After incorporating the new elements, wear the accessory to ensure it fits comfortably and retains the desired look. If necessary, make minor adjustments until satisfaction is achieved.
Properly Closing and Securing the Bracelet
Ensure the clasp is fully engaged by pressing it until it clicks. This step confirms that the closure is secure, minimizing the risk of accidental opening during wear.
Examine the closure mechanism carefully. Different types of fasteners, such as fold-over, butterfly, or deployment clasps, have specific ways to close securely:
- Fold-over clasps: Make sure the clasp is positioned correctly before folding over the top part to secure it.
- Butterfly clasps: Ensure both sides click together before lifting the central part down.
- Deployment clasps: Push down on the side buttons to release and ensure both sides are clicked back into place after fastening.
Inspect the integrity of the links and connections regularly. Look for any signs of wear or looseness that may compromise security:
- Check for any bent or damaged pins.
- Ensure that no spaces exist between the links that might allow movement.
- Pay attention to rust or corrosion on metal components.
For additional security, consider using a safety chain or additional locking mechanism if available, especially on more valuable timepieces. This can prevent loss if the primary clasp fails.
Establish a routine check of the closure mechanism every few weeks. A proactive approach ensures that any potential issues are addressed before they lead to a lost piece.


