
 Ethan Cole

To secure the perfect fit for your timepiece, select a specialized tool designed for adjusting metal or leather bands. This ensures precision and minimizes the risk of damage. Begin by identifying the necessary hole position for resizing, which will accommodate your wrist comfortably.
Use a sturdy work surface and consider employing a microfiber cloth to protect the watch from scratches during the process. Carefully position the band and align it with the chosen adjustment tool, ensuring that all components are stable and secure. This attention to detail is crucial for successfully modifying the band without compromising its structural integrity.
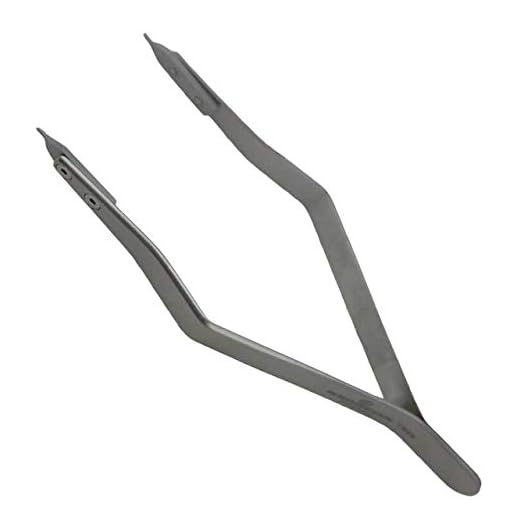


Once the alignment is correct, apply gentle pressure to punch through the material, creating a new hole. It’s advisable to start with minimal force and gradually increase as needed. After creating the new hole, inspect the band for any sharp edges and smooth them out to enhance the overall comfort and usability of your accessory.
Techniques for Adjusting a Timepiece Band
Begin by gathering essential tools: a fine punch tool, anvil or solid surface, compatible pins, and a small hammer. Ensure your workspace is well-lit, and all tools are clean to prevent damage.
Identify the exact spot on the band where the adjustment is necessary. Mark the location carefully with a fine point or pencil to ensure proper alignment during the process.
Executing the Adjustment
Place the band on the anvil or solid surface. Align the punch tool with the marked area, ensuring it’s perpendicular to the band to prevent slippage.
With a firm grip on the punch tool, deliver controlled strikes using the hammer. Multiple light taps are preferable over a single heavy hit to avoid damaging the material.
Once the pin is removed, gently extract it using pliers if needed. Carefully place the band back on your wrist to check the fit. Repeat the process if further adjustments are required.
Finishing Touches
After achieving the desired length, inspect the punch holes for any rough edges. Use a fine file or sandpaper to smoothen any imperfections to prevent irritation on the skin.
Reattach any necessary components, ensuring they are secure. Store the tools properly for future modifications. Regular checks will help maintain the perfect fit over time.
Choosing the Right Tools for Strap Adjustment
Select a dedicated tool for pin removal, often referred to as a spring bar tool. Look for one with a pointed end for easy access to the pin slots, ensuring a precise grip without damaging the material.
A small mallet can be helpful for gently tapping pins if they are stuck. Ensure the mallet is not too heavy to avoid causing dents.
Utilize a soft cloth or a microfiber towel to protect the surface during adjustments. This prevents scratches and keeps the device secure while you work.
If available, a pair of tweezers can assist in handling small parts gracefully, particularly when re-inserting pins or adjusting delicate elements.
Having a magnifying glass nearby can aid visibility for intricate details, especially if the components are small or your eyesight isn’t optimal.
Finally, consider a sturdy workbench or a flat surface to keep everything organized and minimize the risk of losing parts during the adjustment process.
Measuring the Strap Length Accurately
Use a soft measuring tape or a piece of string to determine the precise length required for comfort and fit. Wrap the tape or string around your wrist just above the bone, ensuring it sits snugly but not too tight. Note the measurement at the point where it overlaps.
For a more exact fit:
- Measure both wrists if there’s a noticeable difference, as swelling may affect size.
- Consider the thickness of clothing you typically wear with the accessory and adjust accordingly.
- Account for personal preferences; some prefer a looser fit while others opt for a more snug feel.
To ensure versatility:
- Identify potential adjustment points on the band. Take measurements focusing on maintaining balance and aesthetics.
- Evaluate the location of existing holes or fasteners for optimal customization.
- Consider future adjustments; allow extra length if you expect changes in size.
Finally, double-check your findings to avoid mistakes. Repeat measurements, and use a reliable tool for accuracy. Proper sizing avoids discomfort and ensures a polished appearance.
Marking the Strap for Hole Creation
To ensure precise placement, use a ruler to measure the desired distance from the edge of the material. Mark this point with a fine-tipped pen or pencil to maintain accuracy. It’s recommended to create small, easily visible dots at each location where holes will be made.
Determining the Optimal Distance
Space holes approximately 1 cm apart, considering the type of closure you will use. This spacing allows for adjustable fitting without compromising the structural integrity of the band. If the strap is threaded through a clasp, ensure to measure the required distance when fully secured.
Utilizing Templates for Consistency
Create a template from a piece of paper or cardboard, replicating the desired hole configuration. Place this template against the band, aligning it with your initial markings. This technique ensures uniform spacing and neatness, preventing misalignment during the hole creation process.
Punching the Holes: Techniques and Tips
Utilize a dedicated leather hole punch for clean results. Ensure the selected size corresponds with the width of the band for a perfect fit.
Preparation: Secure the band on a flat, stable surface. Use a cutting mat or a piece of scrap wood beneath to protect your working area from damage.
Technique: Align the tool with your earlier markings. Apply firm and steady pressure while twisting slightly for easier penetration. Avoid excessive force, which can cause uneven holes.
Cleaning Edges: Use a sharp blade to trim any rough edges around the holes after punching. This helps prevent wear and adds a polished look.
- Tip 1: Consider placing a small piece of cardboard behind the band. This provides support and allows for a cleaner hole.
- Tip 2: If adjusting multiple holes, use a template to ensure uniformity in size and spacing.
- Tip 3: Test your tool on a scrap piece before working on the actual material to familiarize yourself with the required pressure.
After creating the holes, check the fit by trying on the accessory to guarantee comfort and functionality. Adjust as necessary for a perfect wear experience.
Testing the Fit After Adjustment
Ensure the new sizing allows for comfortable wear by trying on the accessory. Focus on how it feels on your wrist–there should be a snug fit without excessive pressure. You should be able to slide a finger underneath the band.
Perform dynamic movements such as raising your arm, twisting your wrist, and shaking it gently to check for any discomfort or shifting. The piece should remain stable without pinching.
Monitor the orientation of the closure; it should not be overly tight or loose, preventing any unintended slips. Observe the spacing between the skin and the surface of the accessory; ideal distance allows for airflow.
If adjustments are still needed, make incremental changes to avoid over-compensating. Once satisfied with the fit, consider wearing it for an extended period to validate comfort during daily activities.
For a more precise fit, refer to the following table that outlines common wrist measurements and corresponding adjustments:
| Wrist Size (inches) | Adjustment Length (mm) |
|---|---|
| 6.0 – 6.5 | 10 – 15 |
| 6.5 – 7.0 | 5 – 10 |
| 7.0 – 7.5 | 0 – 5 |
| 7.5 – 8.0 | 5 – 10 |
| 8.0 – 8.5 | 10 – 15 |
After ensuring a satisfactory fit and comfort, your accessory is now ready for everyday use.
FAQ:
What tools do I need to adjust the strap of my wristwatch?
To adjust the strap of your wristwatch, you typically need a few basic tools. These include a spring bar tool, which helps you remove and insert spring bars, and a small, flat screwdriver or a knife for prying open links in metal bands. Depending on the type of strap, you might also need pliers for some adjustments. If you have a leather strap, a hole punch may come in handy for making additional holes for a better fit.
Can I punch a hole in a leather watch strap myself?
Yes, you can punch a hole in a leather watch strap yourself using a leather hole punch. It’s important to work carefully to ensure that the hole is made cleanly and is the correct size. To do this, mark where you want the new hole to be, place the punch over the mark, and apply steady pressure to make the hole. Always ensure that the strap is on a stable surface to avoid damaging it further. If you’re unsure, it’s advisable to consult a professional or an experienced individual.
How do I know if my watch strap is too tight or too loose?
To determine if your watch strap is too tight or too loose, wear the watch for a while. A well-fitted watch should feel snug but not uncomfortable. You should be able to fit one or two fingers between your wrist and the strap. If the strap digs into your wrist or leaves an impression, it’s too tight. Conversely, if the watch slides around or feels like it could easily fall off, it’s too loose. Adjust the strap accordingly until it achieves a comfortable fit.
What precautions should I take before adjusting my watch strap?
Before adjusting your watch strap, it’s important to handle your watch carefully to avoid scratches or damage. First, make sure your workspace is clean and well-lit. Lay down a soft cloth to protect the watch face and strap. If you’re using tools, ensure they are suitable for watchmaking to prevent any unintended damage. Additionally, if your watch is water-resistant, avoid getting it wet during the adjustment process, and be cautious when handling springs or links as they can snap back unexpectedly.


