
 Ethan Cole

To achieve the perfect fit for your accessory, directly acquire a proper tool like a pin pusher or a tiny screwdriver suitable for your timepiece’s links. This ensures precision and avoids potential damage during the adjustment process.
First, inspect the underside of the strap. Most modern designs utilize removable pins or screws for easy adjustment. Identify these components, then gently press or turn them to release the segments that are causing discomfort.
Once the desired number of sections are taken out, proceed to reassemble the remaining pieces. Align them carefully and ensure each pin or screw is firmly secured to prevent any mishaps during wear. A well-fitted piece not only enhances comfort but also guarantees your accessory’s longevity.
Link Adjustment Techniques for Timepieces
Utilize a link removal tool or a small hammer to make adjustments effectively. Place the timepiece face down on a soft surface to prevent scratches. Identify the pin holding the desired link in place.

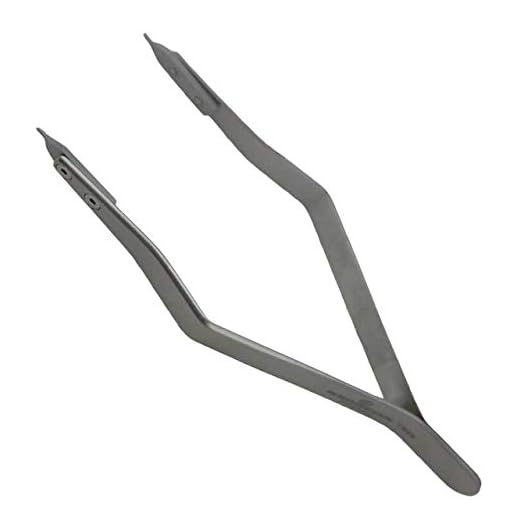
Steps to Detach a Link
- Position the watch securely, ensuring stability.
- Align the tool’s tip with the pin. Carefully tap until the pin starts to release.
- Once partially exposed, grasp the pin with pliers and pull it out completely.
- Remove the link and realign the remaining segments.
- Reinsert the pin to secure the structure.
Alternative Methods
- For pins that are resistant, use a small screwdriver to gently lift the pin before pulling.
- Consider using a dedicated watch repair kit designed for link adjustments.
- In case of a friction-fit clasp, press the sides to release it before handling links.
Always ensure that the process is done with caution, avoiding excessive force that could damage the timepiece. If uncertain, seeking professional assistance may be wise.
Choosing the Right Tools for Link Removal
Opt for a quality link removal tool, commonly available at watchmaking supply stores. A specialized pin pusher is essential for pushing out the pins that connect the components without damaging them.
A watch strap holder is a practical addition, as it stabilizes the piece while adjusting. This prevents accidental slips that could cause scratches or misalignment.
A tweezer set, preferably with non-slip tips, aids in handling small components and ensures precision during the process.
A hard surface, such as a mouse pad or a dedicated work mat, acts as a protective layer against scratches. This also minimizes the risk of losing small parts during disassembly.
Consider investing in a magnifying glass or jeweler’s loupe to improve visibility of tiny details, enhancing accuracy while working.
Finally, safety glasses provide eye protection, preventing injury from flying pins or other small pieces during the adjustment process.
Identifying the Type of Watch Band Links
Examine the construction method of the strap. It can typically include two major types: removable pins and screws. This distinction determines the approach for adjustment.
Removable Pins
Look for small holes along the sides of the links. A pin insertion tool can push out the pin for length adjustment. If the links feature notches, they indicate removable pins often found in metal bracelets.
Screws
Inspect the links for tiny screws visible on the outer sides. A precision screwdriver is necessary for loosening these, enabling adjustments. This type is common in high-end models, ensuring durability.
| Type | Description | Adjustment Method |
|---|---|---|
| Removable Pins | Links with holes for inserting pins | Use a pin tool to push out |
| Screws | Links with visible tiny screws | Use a precision screwdriver |
Identifying the type effectively facilitates the correct tools and techniques suitable for length adjustments. Keep the components organized for reassembly when necessary.
Step-by-Step Guide to Removing Links
Begin by placing the timepiece face down on a soft surface to avoid scratches. Identify the pinholes on both sides where the individual segments connect.
Gather Necessary Equipment
Utilize a link removal tool or a small hammer to tap out the pins. Additionally, have a pair of needle-nose pliers handy for better grip on the pins.
Executing Link Removal
Align the tool with a pinhole and apply gentle pressure to drive out the pin. Pull the pin fully to detach the segment. Repeat this process for any additional segments as required. After adjusting the size, reassemble the bracelet by aligning the remaining segments and securing them with the pins.
Inspect the adjustments carefully to ensure a proper fit. Make certain that the pins are securely in place to prevent future disassembly during regular wear.
Tips for Reassembling the Watch Band
Align the links properly to ensure a smooth fit. Start at one end and work your way to the other, ensuring each component clicks securely into place. Look for alignment holes or pins that facilitate connection.
Securing with Pins
Utilize a small tool to gently push the pins back into position. Ensure that the pins are flush with the surface to prevent discomfort while wearing. It may be beneficial to use a little lubricant on the pins to aid their insertion.
Final Adjustments
Examine the overall length and comfort of the assembly. Make fine adjustments by adding or removing links if necessary. Ensure that the closure mechanism functions smoothly and is easy to adjust for a snug fit.
Maintaining Your Watch After Adjustments
Regular maintenance ensures longevity and performance. After modifications, check the tightness of the connections. Loose fittings can cause the timepiece to shift or even detach. Periodically inspect for any signs of wear, particularly where links connect.
Clean the exterior with a soft microfiber cloth to remove dust and fingerprints. Avoid harsh chemicals that can harm the finish. Consider using a dedicated cleaner suitable for the material to preserve its luster.
Store the timepiece in a designated case or compartment when not in use. This prevents scratches and impacts that could affect its integrity. For models with intricate mechanisms, consider utilizing a watch winder to keep it adequately powered without overexerting the movement.
Monitor for any irregularities in function or timekeeping post-adjustments. If issues arise, consult a qualified technician to address them promptly, ensuring your timepiece remains in optimal condition.
Lastly, periodically lubricate hinges and joints as specified by the manufacturer to maintain smooth operation and prevent seizing or degradation of components.


